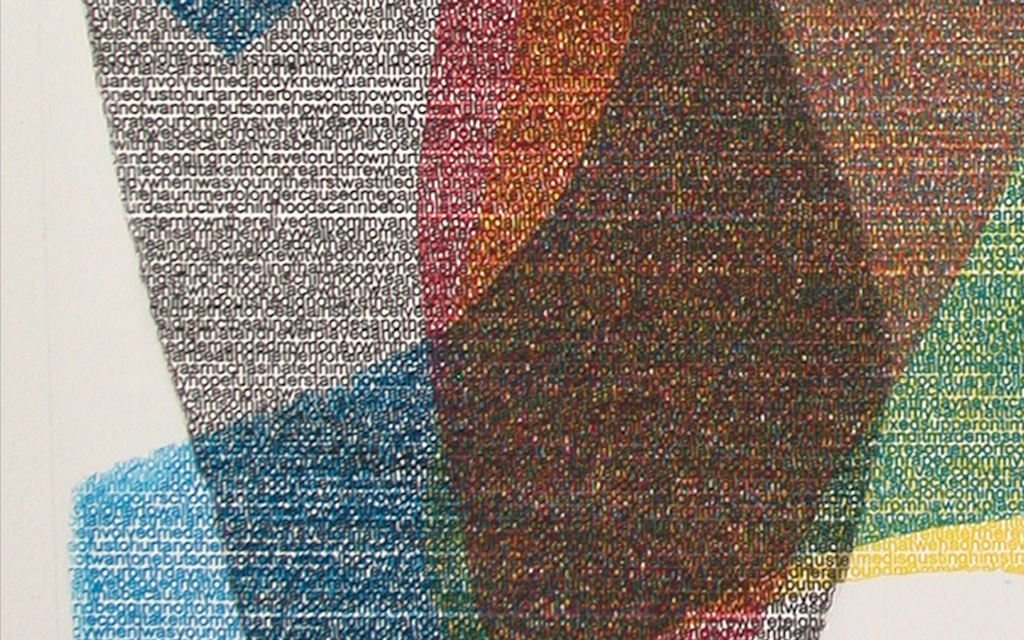
31. Wrinkled Intaglio-Type
For Construction Intaglio-Type, individual pieces of ImagOn are laminated to a prepared plate. The Mylar layer for each piece is usually removed before laminating another piece of ImagOn to the plate; if the Mylar remains in place, the developer will not reach that piece of film so it will remain white. An entire image could be constructed so that only the black outlines of the pieces print.
Construction Intaglio-Type can be combined with many other Intaglio-Type techniques. Construction Intaglio-Type with Text Stencils Typed or handwritten text stencils can create effective imagery for Construction Intaglio-Type.
Materials and equipment Construction Intaglio-Type with text stencils requires: a prepared plate; ImagOn; cutter with sharp blade; scissors; text stencil; standard tray developing materials and equipment.
Steps
Begin by cutting a few pieces of ImagOn and removing their
protective layers. Laminate the pieces to the plate individually with a
squeegee. The top photo shows a couple of pieces laminated to the prepared plate. Remove the Mylar from the laminated pieces before overlaying more ImagOn pieces to the plate (second photo). Continue overlaying as desired, laminating each piece with a squeegee and removing the Mylar. It is not necessary to cover the entire plate with pieces. After all pieces have been layered, cover the plate completely with a reserved Mylar at least as large as the plate (third photo).
Run the plate through the press to facilitate bonding. Leave the plate overnight. Expose the pieced plate with a text stencil. The text stencil used here is Arial Font 12; the lines are finer than 1/8 inch so an aquatint screen exposure is not needed prior to the image exposure with this text stencil (bottom photo). Tray develop the exposed plate in the standard manner.
Rinse; spray with vinegar; rinse; dry; heat dry. Expose the plate without a stencil for the same amount of time as an aquatint screen exposure. Set the plate aside overnight before printing. Construction Intaglio-Type with Photo Stencils
Photo stencils can create effective imagery for Construction Intaglio-
Type.
Materials and equipment
Construction Intaglio-Type with photo stencils requires: a prepared plate; ImagOn; cutter with sharp blade; scissors; photo stencil; aquatint screen (optional); standard tray developing materials and equipment
Steps
Begin by cutting a few pieces of ImagOn and removing their protective layers.
Laminate the pieces to the plate individually with a squeegee. Remove the Mylar from the laminated pieces before overlaying more ImagOn pieces to the plate.
Continue overlaying as desired, laminating each piece with a squeegee and removing the Mylar. It is not necessary to cover the entire plate with pieces.
After all pieces have been layered, cover the plate completely with a reserved Mylar at least as large as the plate.
Run the plate through the press to facilitate bonding. Leave the plate overnight.
Make a standard aquatint screen exposure if needed for the photo stencil.
Make the image exposure with the photo stencil. The photo stencil shown above was previously manipulated in Photoshop to avoid the aquatint screen exposure: Curves were changed to 80% and 15% and the photo was printed onto an Azon 787N transparency with an Epson 7600 inkjet printer.
Tray develop the exposed plate in the standard manner. Rinse; spray with vinegar; rinse; dry; heat dry. Expose the plate without a stencil for the same amount of time as an aquatint screen exposure. Set the plate aside overnight before printing. Construction Intaglio-Type with Flat-Object Stencils Flat objects can be used as stencils for imagery with Construction Intaglio-Type.
Materials and equipment
Construction Intaglio-Type with flat-object stencils requires: a degreased plate; ImagOn; cutter with sharp blade; scissors; aquatint screen; flat objects (such as spuds, tarlatan, and gloves in the printmaking studio); standard tray developing and
spit-bite materials and equipment.
Steps
Cut ImagOn-Ultra pieces and adhere to a prepared plate, leaving open areas. Remove the Mylar from the pieces before overlapping more pieces. Laminate each individual piece to the plate with a squeegee. Cover the entire plate with a large piece of set-aside Mylar and press laminate the plate. Make a standard aquatint screen exposure.
Place flat objects on the construction ImageOn plate, such as the gloves and spuds and torn tarlatan with loose threads. Make a standard image exposure for flat objects. Remove the Mylar and tray develop according to standard
development procedures. Sprinkle the plate with water to add more pieces of ImagOn, if desired. Remove the Mylar layers before overlapping and laminate each individual piece with a squeegee as you go. Again, press laminate with a large Mylar in place before another exposure with the aquatint screen followed by exposure with more flat objects. Remove the Mylar and hand develop.
The top photo is a proof print made after two rounds of exposure and development.
Again, sprinkle the plate with water to add more pieces of ImagOn, if desired. Remove the Mylar layers before overlapping and laminate each individual piece with a squeegee as you go. Again, press laminate with a large Mylar in place before another exposure with the aquatint screen followed by exposure with more flat objects. Remove the Mylar. Hand develop with standard spit-bite procedures.
The second photo is a proof print made after three more rounds of exposure and hand development with spit-bite procedures. The bottom photo shows the print after further spit-bite development, cutting away layers of film and drypoint to
increase blacks.
Intaglio Type
Crackle Intaglio-Type
Crackle is an overall cracked effect associated with pottery glazes and glassware. Crackle can also be achieved with ImagOn photopolymer, with or without exposing the plate. Crackle Intaglio-Type on an Unexposed Plate When the ImagOn plate has not been exposed, the print shows black lines against a white background.
Materials and equipment
Crackle Intaglio-Type requires: ImagOn laminated to a prepared copper plate; prepared developing solutions and supplies; printmaking hot plate; Gum Arabic; small container; and brushes.
Steps
Turn the printmaking hot plate on and set the temperature to 110°F ahead of time. The temperature should not become too hot for finger touching. Pour a small amount of Gum Arabic into a small container. Remove the Mylar from the unexposed ImagOn plate and place the ImagOn plate on the hot plate.
Brush Gum Arabic on the unexposed photopolymer selectively or over the entire plate (top photo). The thinner the application of Gum Arabic, the quicker it dries and the finer the crackle. Crackles will be visible when the Gum Arabic dries. Remove
the ImagOn plate from the hot plate. Tray develop the ImagOn plate in the standard manner: 9 minutes in developer, rinse, rub with vinegar, rinse, pat dry,
heat dry, leave overnight to harden.
Construction Crackle Intaglio-Type on an Unexposed Plate A variation of Crackle Intaglio-Type is to apply pieces of ImagOn to the plate instead of covering the plate with a single layer of ImagOn. The Construction Crackle Intaglio-Type plate in the bottom photo was made by laminating pieces of ImagOn to the copper plate and then applying Gum Arabic to the unexposed plate. The plate was developed
in the standard manner, rinsed, sprayed with vinegar, rinsed, dried, heat
dried and left overnight before printing. Note: Gum Arabic does not stick to open areas of the copper plate.
Construction Crackle Intaglio-Type with Aquatint Exposure
When the ImagOn plate has been crackled, the print shows black crackle lines against white or light areas of the image. Black crackle lines do not show up against black so it would not be effective to apply crackle to an ImagOn plate exposed
only with an aquatint screen. However, a layer of ImagOn exposed with an aquatint screen and developed can have pieces of ImagOn laminated over the developed aquatint exposure layer; these pieces are never exposed and are hand- developed with spit-bite solution after Crackle Intaglio-Type is applied to the construction pieces.
Materials and equipment
Construction Crackle Intaglio-Type with aquatint exposure requires: ImagOn laminated to a prepared copper plate; prepared developing solutions and supplies; printmaking hot plate; Gum Arabic; small container; brushes and/or eye dropper; aquatint screen; and spit-bite solutions.
Steps
Turn the printmaking hot plate on and set the temperature to 110°F ahead of time. The temperature should not become too hot for finger touching. Pour a small amount of Gum Arabic into a small container. Expose the laminated ImagOn copper plate with the standard exposure for an aquatint screen. Tray-develop the plate in the standard manner; rinse; spray vinegar; rinse; dry.
Spray the plate with water.
For Construction Crackle Intaglio-Type, apply pieces of
ImagOn to the plate, removing the Mylar after laminating
each piece with a squeegee. Cover the entire plate with Mylar or the protective film
backing. Run the plate through the press to adhere the construction pieces to the bottom aquatint-exposure layer. Do not expose the construction plate. Remove the Mylar. Brush Gum Arabic on the construction plate but not on the
aquatint-exposed bottom layer. Heat the construction plate until the Gum Arabic dries. Remove the construction plate from the hot plate.
Hand-develop the construction layers with spit-bite solutions (above). Rinse; spray vinegar; rinse; dry; heat dry. Leave overnight before printing.
The Construction Crackle intaglio-Type in the photo opposite has an aquatint-exposed lower layer that was tray developed prior to construction layers for crackle; these non-exposed pieces were developed with spit-bite after Gum Arabic application in the manner described on this page.
Crackle Intaglio-Type with Photo-Stencil Image Exposure
Crackle Intaglio-Type can be applied over a laminated copper plate that
has been exposed with a photo-stencil. The thinner the application of
crackle, the quicker the gum dries and the finer the crackle.
Materials and equipment
Crackle Intaglio-Type with Image Exposure requires: ImagOn laminated to a prepared copper plate; prepared photo-stencil transparency; prepared developing solutions and supplies; printmaking hot plate; small container of Gum Arabic; and brushes.
Steps
- Manipulate the photograph in Photoshop as desired; end by changing the Mode to Grayscale and the Curves to 80% and 15% to avoid the necessity for an aquatint screen exposure. Print a transparency.
- Turn the printmaking hot plate on and set the temperature to 110°F ahead of time. The temperature should not
become too hot for finger touching. - Pour a small amount of Gum Arabic into a small container.
Expose the laminated ImagOn copper plate with the standard exposure determined for the photo stencil. - Place the exposed ImagOn plate on the hot plate. Protect the exposed ImagOn plate from direct sunlight by propping a cookie sheet against the hot plate if necessary.
- Brush Gum Arabic thinly on the plate for a fine crackle.
When the Gum Arabic is dry, tray-develop the plate for 8½ minutes. Rinse; spray vinegar; rinse; dry, heat dry. - Expose the plate without a stencil for the same amount of time an aquatint screen exposure requires. Leave the
plate overnight before printing.
Note: The thinner the Gum Arabic is applied, the less time it takes to dry. This becomes significant for an exposed ImagOn plate. The long drying required for a thick application of Gum Arabic overexposes an image-exposed
ImagOn plate. Covering the plate with a cookie sheet does not help since the cookie sheet delays drying.
Crackle Intaglio-Type with Photo-Stencil Image Exposure
Crackle Intaglio-Type can be applied over a laminated copper plate that has been exposed with a photo-stencil. The crackle shows up better on an image consisting mainly of light tones rather than dark tones.
Materials and equipment
Crackle Intaglio-Type with Image Exposure requires: ImagOn laminated to a prepared copper plate; prepared photo-stencil transparency; prepared developing solutions and supplies; printmaking hot plate; small container of Gum Arabic; and brushes.
Steps
Manipulate the photograph in Photoshop as desired; end by changing the Mode to Grayscale and the Curves to 80% and 15% to avoid the necessity for an aquatint screen exposure. Print a transparency. The photo (right) has been manipulated in Photoshop, including the Mode and Curves changes in preparation for use as a photo stencil.
Turn the printmaking hot plate on and set the temperature to 110°F ahead of time. The temperature should not become too hot for finger touching. Pour a small amount of Gum Arabic into a small container. Expose the laminated ImagOn copper plate with the standard exposure determined for the photo stencil. Place the exposed ImagOn plate on the hot plate. Protect the exposed ImagOn plate from direct sunlight by propping a cookie sheet against the hot plate if necessary.
Brush Gum Arabic thinly on the plate for a fine crackle. When the Gum Arabic is dry, tray-develop the plate for 8½ minutes. Rinse; spray vinegar; rinse; dry, heat dry.
Expose the plate without a stencil for the same amount of time an aquatint screen exposure requires. Leave the plate overnight before printing.
Ghost Printing with Paper Stencils
Paper stencils can be applied to the plate (or the printing paper) to selectively block areas of the inked plate from printing. The print shows white where the ink printed on the stencil instead of the printing stock. A variation of this technique blocks the ink with a stencil for one run of the plate and then removes the stencil to re-print the same plate; this produces a ghost image in the area originally covered by the stencil.
Materials and equipment
Printing Intaglio-type with paper stencils requires: an inked ImagOn plate;
standard printing supplies and equipment; opaque paper for stencils.
Steps
- Position the plate on clean newsprint on the press bed. Position torn or cut paper on the plate in selected areas.
- Run the paper-stencil-plate sandwich through the press once. At this point, the final print would appear white where the stencil is
located. - To produce a ghost image, hold the printing stock in place by bricking (i.e., positioning a weight on the print at the end farthest from the press rollers) as in the top photo.
- Fold the end of the print closest to the rollers over the brick (second photo). Remove the stencil from the printing stock by lifting from one corner (third photo).
- The stencil is totally removed in the fourth photo.
Carefully reposition the printing stock over the plate (fifth photo). - Remove the brick.
- Run the plate and printing stock through the press a second
time, but without the stencil for the second run-through. A lighter
ink now appears where the stencil was removed.
35. À la Poupée Inking
Poupée is French for doll or dollie. À la poupée is the easiest way to print with more than one color: apply two or more ink colors selectively to a single plate with a felt dauber or rag wadded in a shape somewhat reminiscent of a doll. Only one run through the press is necessary to achieve multiple colors in the print.
Materials and equipment
À la poupée requires: an exposed and developed ImagOn plate; two or more Akua ink colors; one section of 4 x 6 inch heavy felt or rag for each color; cord or packaging tape; plastic wrap and Ziploc bag for each color; standard inking and printing supplies and equipment
Steps
Make a dauber for each color by rolling the felt tightly and securing it with cord or packing tape; or make a dollie by making a ball with rag material and tying a cord around the ball. Apply the lightest ink color to selected areas of the plate with
a dauber. Red ink has been applied to two areas of a Mezzo-
Type plate in the top photo. Remove excess ink with pellon and/or newsprint (second photo).
Apply the second (or next lightest) ink color to selected areas with a second dauber. Remove excess ink with pellon and/or newsprint, blending colors where they meet. The third photo is the Mezzo-Type plate inked with red and black in distinct
areas. If more colors are intended, continue in the same manner. Print the plate. The bottom photo shows the two-color print being lifted from the plate. To store the daubers, wrap them in plastic wrap and place them in a Ziploc bag.
Intaglio Type
35. Digital-Halftone Intaglio-Type for Process Color Photo Stencils
- Colored photographs can be printed as non-etch Digital-Halftone Intaglio-Type on four plates with process (CMYK) colors. To avoid the necessity of an aquatint screen exposure prior to the image exposures, make the Dot Structure Density Test for the transparency and inkjet printer to determine the density that opens up 100% blacks to an 80% random dot structure.
- Create a digital halftone for each color channel in Photoshop.
- Manipulate the Image in Photoshop
Materials and equipment
Digital-Halftone Intaglio-Type for Process Color Photo Stencils: Manipulating the image requires: film or digital photograph; Photoshop (or other image-manipulation software); transparency, such as Azon 787N Clear Graphic Film; and an inkjet printer, such as Epson PRO 7600.
Steps - Open the original photo file and save as a new tiff file in a new folder to preserve the original file (top right photo). Work with the duplicate file.
- Change the size to fit the transparency: Image, Image Size, uncheck Resample Image. Fill in the inches. Click OK. Change the resolution so it is at least 1/4th the printer output, 720 on the Epson PRO 7600 (some say 1/6th or 120): Image, Image Size. Check Resample Image, Bicubic, and Constrain
Proportions, as in the top right figure. - Crop the image if it improves the image or if needed to fit the transparency: Select with a Marquee Tool; then Image, Crop. Straighten any angled lines: Select, All; Edit, Transform, Skew.
Straighten the image if needed: Image, Rotate, Arbitrary; fill
in degrees and CW or CCW. - Improve the contrast: Image, Adjustments, Levels. Move the
sliders as needed to get black and white. Save as a new tiff
file. - Adjust the midtones: Image, Adjustments, Curves. Move the
diagonal as needed.
Adjust saturation and/or lightness: Image, Adjustments,
Saturation; move the sliders as needed to improve the image. - If the image was scanned, sharpen the image in increments; do not sharpen digital camera images, such as
this image. To sharpen: Filter, Sharpen, Unsharp Mask, check Preview. Use 25-50%, 1-3 Radius, 0-2
Threshold. Save as a new tiff file. If needed, repeat these steps and save as another new tiff file. - Magnify the image with the Zoom Tool in the Toolbox to remove defects with the Clone Tool or Band-aid Tool.
Save as a new tiff file. - Change the mode: Image, Mode, CMYK. Save as a new tiff tile.
Prepare the Digital-Halftone Stencils.
If any of the four colors in the image do not touch all edges, add a border to assist registration. After performing the dot structure density test for the printer and transparency and determining the percentage with the blackest black, adjust the image accordingly. - Steps
To create a border, select Black as the foreground color in the Toolbox. Select, All. Edit, Stroke. In the drop-down menu: select Inside, Blending Normal, 100%.
Obviate the need for an aquatint exposure by lowering the density of blacks in Curves: Image, Adjustments, Curves; then drag the black diagonal to the percentage determined by the dot structure density test. The best black prints at 80% for Azon 787N Clear Graphic Film in an Epson PRO 7600 Printer.
To assist registration when K will be the last color printed, feather the edges in the CMY Channels: Select CMY Channels; Filter, Blur, Gaussian Blur, .5; Filter, Noise, Add Noise, .5 Gaussian. Save as a tiff file.
Split the Channels: Channels, Split Channels. Four grayscale files pop up, as shown. Initial each file the appropriate color with the Text tool. Save the four files. - Set the printer to best quality, Black. If the printer has the option, print with two cartridges of matte black ink. To print AZON 787N Clear Graphic Film in the Epson PRO 7600 Inkjet Printer: Select the printer and film size; in
Print Settings, select Black, Adhesive Vinyl, Advanced (uncheck all boxes), 720 dpi. - Print on the emulsion side of the transparencies. Be careful handling the transparencies to avoid fingerprints that could block light.
Label each ImagOn plate with CMY or K and make an arrow in the lower left “key” corner of each plate. Expose each plate with its corresponding transparency. Develop; rinse; spray vinegar; rinse; dry; heat dry. Set aside with its corresponding transparency. Develop; rinse; spray vinegar; rinse; dry; heat dry. Set aside overnight. Copper plates need to be registered with a template. This method also works for P.E.T.G. plates.
Materials
Process Color Intaglio-Type requires: 4 exposed and developed ImagOn plates; standard inking and printing supplies;
Akua inks: Hansa Yellow, Crimson Red, Phthalo Blue, Carbon Black; tissue paper; clean paper and pencil; Scotch tape.
Steps
Trace a plate near one end of a long sheet of paper; this
becomes a template for registration. Tear a long sheet of paper. Cut four pieces of tissue paper slightly larger than the plates. Ink each plate with its associated color (photo opposite).
- Use a separate pair of gloves for each color for inking and wiping.
Place the yellow plate on a cut tissue paper. Register the lower left corner of the yellow plate on the template through the tissue. Run the paper, tissue and template through the press but keep the end of the paper and template trapped
under the press roller. - Lift the paper and tape to the press. Remove the yellow plate and its tissue.
Position the red plate on a cut tissue paper. Register the lower left corner of the red plate (opposite). Run the plate through the press twice without loosening the printing stock. - Lift the paper and tape to the press. Remove the red plate
and its tissue. - Position the cyan plate on a cut tissue paper (opposite).
- Register the lower left corner and print as before. Lift the
- paper and tape to the press. Remove the cyan plate and its tissue.
- Position the black plate on a cut tissue paper (opposite).
- Register the lower left corner and print as before. Lift the
- paper and tape the final print to the press. Remove the black plate and its tissue.
- Loosen the press and remove the final print and the template
- paper.
Intaglio Type
37. Four Color Inversion Printing
The introduction of see-through P.E.T.G. plates has permitted the
development of 4-Color Inversion Printing. Instead of positioning plates
under the printing stock on a template for registration, the plates are positioned one-by-one on the printing stock and registered by looking through the MCK plates at the image below after the Y plate has been run through the press. A headlight facilitates accurately positioning the plates. Images no longer need to be carefully aligned on the plates. This new way of registration has facilitated a new edge aesthetic where edges of plates overlap.
Materials and equipment
4-Color Inversion Printing requires: four-color laminated, exposed, and developed ImagOn plates for an image converted to CMYK; standard inking and printing supplies, including Akua Hansa Yellow, Crimson Red, Phthalo Blue, Carbon Black; headlight; prepared printing stock; clean paper larger than the printing stock.
Steps
– Soak the paper for 15 minutes or work from a wet pack prepared a day ahead.
Ink and wipe the four exposed and developed ImagOn CMYK plates wearing separate gloves for each color (top).
– Calendar the printing stock: place the dampened sheet of printing stock on the press and run it through a press with a clean sheet of paper on top. Remove the protective paper.
– Position the yellow plate face-side-down on the calendared
stock (second photo). Cover the stock and plate with paper.
– Run through the press.
– Remove the protective paper. Lift the yellow plate from the paper (third photo). Wearing the headlight to aid positioning, place the red plate face-side-down on the printing stock in alignment with the yellow image (fourth photo). Cover the stock and plate with paper. Run through the press.
- Remove the protective paper. Lift the red plate from the paper
(fifth photo).
- Wearing the headlight to aid positioning, place the cyan plate face-side- down on the printing stock in alignment with the yellow-red image (sixth photo). Cover the stock and plate with paper. Run through the press.
- Remove the protective paper. Lift the cyan plate from the paper (seventh photo).
- Wearing the headlight to aid positioning, place the black plate face-side-down on the printing stock in alignment
with the yellow-red-cyan image (eighth photo). Cover the stock and plate with paper. Run through the press.
- Remove the protective paper. Lift the black plate from the
paper (ninth photo).
- The bottom photo is the 18 x 24 inch final print produced with
CMYK digital-halftone transparencies and printed with the 4-
Color Inversion method.
38. Printing with Chine Collé
Chine Collé (from the French chine collée – literally “Chinese paper attached”) is a method of collaging any paper for color or textural interest to printing stock whilst printing the plate. A glue stick is adequate for adhering small pieces of paper to the printing stock. Potato starch, wheat paste or 3M Scotch 568 Positionable Mounting Adhesive (PMA) work better for adhering larger pieces of paper.
Materials and equipment
Chine Collé requires: a prepared and developed plate; a roll of 3Ms PMA; prepared printing stock; lightweight paper contrasting in color and/or texture; inking and printing supplies.
Steps
Cut one or more shapes from contrasting paper. Position the cut shape(s) on the adhesive side of the PMA roll; cover with the supplied cover sheet. Squeegee with the supplied squeegee to adhere the shape(s) to the adhesive (top photo).
Remove the cover sheet (second photo). Lift the adhesive-backed shape(s) from the PMA support sheet (third photo).
- Position the shape(s) on the plate with the adhesive side up OR position directly on the printing stock with the adhesive side down and push down as needed for printing with a P.E.T.G. plate (fourth photo).
- Position the plate on the printing stock. Run the plate,
shape(s) and printing stock through the press. - Lift the plate from the print (bottom right photo).
The photo at bottom left shows the 16 x 20 inch print
produced with the images shown here.
Intaglio Type
Reworking Techniques
Reworking ImagOn plates is much easier than reworking traditional intaglio plates. Spit-bite and Mezzo-Type are used for reworking ImagOn plates as well as stand alone Intaglio-Type techniques. Liquid Aquatint is usually reserved for reworking
ImagOn plates. All three techniques can be used alone or in combination to rework a plate.
Reworking with Spit-bite
Spit-bite permits reworking areas of an ImagOn plate that need more development to produce a rich black, whether under-developed or under-exposed. This is particularly useful for plates with the full range of tones that are exposed to keep the light tones when further exposure is needed to produce the richest blacks. Hand-developing with various concentrations of soda ash developer also permits developing through one layer of ImagOn to reveal areas of a lower layer after the initial development of Layered-Intaglio or Wrinkled-Intaglio plates.
Materials and equipment
Reworking with Spit-bite Intaglio-Type requires: prepared concentrations of developer solution: Mild (10 grams soda ash per liter of water),
Medium (25 grams soda ash per liter of water), and Strong (50 grams
soda ash per liter of water); laminated and printed ImagOn plate that
requires reworking to produce the best image; brush; water in a small
container; vinegar in a spray bottle or tray; paper towels.
Steps
Brush one or more concentrations of developer onto the
single layer of a developed, dried plate in the area requiring a
- Brush one or more concentrations of developer onto the
single layer of a developed, dried plate in the area requiring a
richer black or onto the upper layer of ImagOn where areas
need to be removed on a Layered-Type or Wrinkled-Type
ImagOn plate. - When the developer turns light blue, rinse the plate with cool
tap water.
Reapply as needed and rinse with cool tap water after each
application. - Spray the plate with vinegar to stabilize it.
Rinse the plate with cool tap water.
Heat dry the plate with a commercial hand drier or heat gun. - Sun dry the plate for 30 minutes or expose it without a stencil
for the length of time used for the standard aquatint exposure.
The photo (right) is Stage 1 of the final print. This Wrinkled-Type image was improved by removing uninteresting areas of the top layer.
Reworking with Liquid Aquatint and Mezzo-Type
Liquid Aquatint Intaglio-Type permits a rich black when applied directly onto a prepared plate but is usually reserved for reworking a developed ImagOn plate. It is often used in combination with other reworking techniques, such as Spit-bite and Mezzo-Type to increase the tonal range and add textural as well as tonal interest.
Materials and equipment
Reworking with Liquid Aquatint and Mezzo-Type requires: a small container; screenfiller; stirring device; carborundum grit (100 or 200 grit); paint brushes; prepared unlaminated plate or developed ImagOn plate; inking and printing supplies.
Steps
– Add a small amount of screenfiller to a container. Stir in carborundum grit to the desired consistency; for the richest black, add enough grit to make the mixture the
consistency of oil paint, slightly thicker than cream.
– Paint the mixture directly onto a prepared plate or onto an
ImagOn plate. Be sure the mixture is completely dry before
proceeding.
- Apply Spit-bite over Liquid Aquatint to remove undesired
areas; rinse with water; spray vinegar; rinse again. Be sure the
Liquid Aquatint is dry before proceeding. - Rework screenfiller over dry Liquid-Aquatint to introduce
lighter tones if desired. Dry the plate.
When all reworking is complete and the plate is completely dry,
print the plate.
The top photo is Wash-Drawing Intaglio-Type with Spit-bite applied to the
ImagOn plate for edge interest. Stage 2 of the same ImagOn plate
resulted from reworking alternately with Mezzo-Type and Liquid Aquatint
Intaglio-Type, drying between each application (bottom photo). Note that
Liquid Aquatint adheres to open areas of the plate as well as to the film.
Reworking with Mezzo-Type in Combination
Mezzo-Type can be reworked on an ImagOn plate alone or in combination with other reworking techniques, such as Spit- bite, Liquid Aquatint or drypoint to introduce lighter tones. Mezzo-type adds gray tones when painted directly onto a prepared plate.
Materials and equipment
Reworking with Mezzo-Type requires: a small container of screenfiller; stirring device; painting tools; developed ImagOn plate; inking and printing supplies.
Steps
- Apply screenfiller to the ImagOn plate with a brush, toothbrush or eyedropper. Rinse off after the screenfiller partially dries, if thin lines are desired. Be sure the plate is completely dry before proceeding.
- Apply more screenfiller, if desired, alone or alternately with
Liquid Aquatint or Spit-bite, drying between applications.
When reworking is complete and the plate is dry, print the
plate. - The top photo is the plate worked initially with drypoint and Mezzo-Type
on the aquatinted ImagOn film and directly on the plate. Film edges were
randomly lifted with masking tape. - The second photo is Stage 2 of the same plate reworked with Spit-bite,
drypoint, and Mezzo-Type. - The third photo is Stage 3 of the same plate reworked with the same
three techniques.
The photo below is Stage 4 of the same plate reworked with Spit-bite and drypoint.