(note: these are the original instructions related to research by Keith Howard / F K and Edinburgh Printmakers, and Mark Zaffron)
Hard Ground

testing new grounds at RIT, 2002, Friedhard Kiekeben | Dr Paul Craig | Keith Howard
A hard ground is a corrosion resistant coating that covers the entire surface of an etching plate. Once this acrylic varnish has dried it can be worked into using an etching needle and other implements so that the ground is penetrated and areas of metal are revealed. The grooves which are then etched, provide a very accurate, crisp impression of the inscribed marks. Often this way of working has the character of a pen and ink drawing. Hard ground etching evolved from burin engraving which is entirely line-based, but has the capacity to be much more versatile.

Liquid hard ground
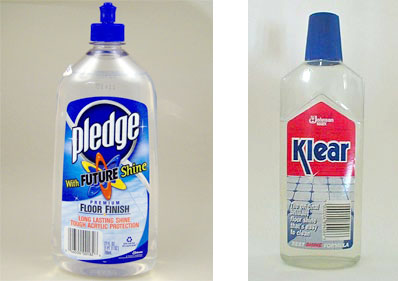
A hard ground allowing line work of the highest quality can be obtained by using the type of acrylic floor varnish that iswidely available for domestic use. It took Keith Howard’s lateral thinking to discover that a superb nontoxic hard ground may not necessarily have to be developed from scratch, because it was already out there on the shelves of his local hardware store. The brand Howard used, called Future, pointed optimistic to an alternative way ahead for printmakers. Future ( now Pledge ) acrylic floor polish (made by Johnson), has now been firmly established as a standard hard ground for North American etchers. Products with similar properties can be found in most countries – in the UK Johnson’s Klear (Klar in Scandinavia) makes a good substitute. Other manufacturers also produce viable products so when doing your own research, look for products that are described as waterbased metallised polymer emulsion in the product safety information.
The liquid hard ground created using these products is very fast drying and during etching in the metal salt solutions it completely retains the crispness of edge given to it by the drawing utensils. It is suitable for the whole spectrum of linear work, ranging from the most delicate line to the boldest and deepest bite. It also meets another crucial requirement for a hard ground – its ability to go through multiple etches and overlapping cross-hatching without any breaking up in the intersecting intaglio areas. There are two different ways of applying the liquid hard ground; it is normally poured directly onto the plate but if a spraying facility is available it can be applied by means of a spray gun which gives the most even result. At one time it was not recommended for the ground to be brushed onto the plate (unless for stopping-out purposes) as this produced an uneven finish, but the method does work if a paint pad is used fro application. (See HARD AND SOFT GROUND for further details.)
Pour-on Hard Ground
The hard ground is applied in one or two stages, depending on the kind of metal being used, the length of the bite and the kind of floor polish available. The thicker Future varnish gives good etchant resistance on most metals even with only one coating; whilst the thinner varnishes available in Europe give the best results with two coatings of the plate. This involves laying down a pure initial coat of varnish to ensure maximum resistance, followed by a second tinted coat which contains pigment and enables the artist to see drawn lines more clearly. Usually, a liquid acrylic hard ground requires a slight roughening of the plate surface in addition to degreasing to guarantee perfect adhesion of the acrylic to the metal (see PLATE PREPARATION). This slightly toothed surface ensures an ideal etch and the faint plate tone that is produced is quickly removed before printing. Despite this roughening, even delicate line work registers faithfully on the liquid ground.
Acrylic resist etching also offers various hard ground options for etchers wishing to work on a polished surface as traditionally practised. Both Future and Z-Acryl hard ground emulsion tolerate being used on polished plates, as do the various combined soft and hard grounds (see SOFT GROUND).
MATERIALS
Products and equipment needed for pour-on hard ground application:
acrylic floor varnish
US/Canada: Johnson’s Wax Future (Pledge)
UK/Europe: Johnson’s Klear, Carefree etc.
Z-acryl hard ground emulsion can also be used (no longer available)
Koh-i-Noor 3080-4 universal drawing ink, black airbrush ink etc.
plastic tray (should be larger than the plates being used)
funnel
absorbent paper
METHOD
Mix the pour-on hard ground as follows:
Coat 1
For maximum resist use pure acrylic floor varnish.
Do not mix with other ingredients.
Coat 2
Gradually add a small amount of Indian ink (or alternative) to the acrylic floor varnish.
Stir continuously until the liquid looks sufficiently opaque.
Do not add too much ink as this may affect resist.
METHOD
Apply the pour-on hard ground as follows:
1. Prepare a metal plate as described in previous sections.
2. Hold your plate in a horizontal position above a tray.
3. Pour a generous amount of hard ground (coat 1) onto the middle of the plate.
4. Swivel the plate around until the whole surface of the plate is covered. Allow excess varnish to drip into the tray.
5. Pour more varnish over areas that have not been covered.6. Lean the plate upright for up to 30 seconds to allow excess ground to drain off. Place blotting paper underneath to improve drainage.
7. Place the plate in a flat position in a drying cupboard for 15 minutes (if the thicker Future -Pledge- has been used, leave upright). Gentle but not excessive heat (approx. 35-40 degrees C) is ideal for curing the acrylic ground. Drying time without heat will be up to 30 minutes.
8. Pour excess hard ground from the tray back into the bottle using a funnel.
9. When the first coat has fully dried repeat the process using hard ground Coat 2. This will provide sufficient thickness for a deep line bite.
10. The ground is ready to use when the second coat is dry.
For copper and zinc plates it is possible to apply only one coat of hard ground (Coat 2) if no deep etch is required. The more porous steel plates however necessitate the two-coat process. If line work is to be applied to existing intaglio areas again the application of more than one coat of varnish is essential to ensure full coverage of the modulated plate surface. In this instance it can be useful to work just with pure liquid hard ground so that existing marks remain visible through the clear film.
Spray-On Hard Ground
A sprayed liquid hard ground fulfils the same purpose as a poured one but has the advantage of being extremely even. This is particularly useful on plates which are meant for printing directly from the acrylic surface to obtain a crisp white background to the print.
METHOD
Products and equipment needed for spray-on hard ground application:
a ventilated spray booth (aquatint booth)
If possible, use an industrial grade spray gun rather than a designers airbrush.
spray mask
liquid hard ground coat (1)
liquid hard ground coat (2)
METHOD
Apply a spray-on hard ground as follows:
1. Prepare a metal plate as described in previous sections.
2. Lean the plate against the back of the spray booth.
3. Spray on liquid hard ground coat 1 in even horizontal strokes, gradually moving down the
plate.
4. Now spray in a vertical direction until the plate is sufficiently covered. Do not overspray but remember that unlike spray aquatint, here the aim is to produce an even cover not a fine mist.
5. Place the plate in a flat position in a drying cupboard for 15 minutes. Gentle but not excessive heat (approx. 35-40 degrees C) is ideal for curing the acrylic ground.
6. Apply the opaque hard ground coat 2 in the same fashion.
7. Clean the spray gun with soapy water and let the plate dry.
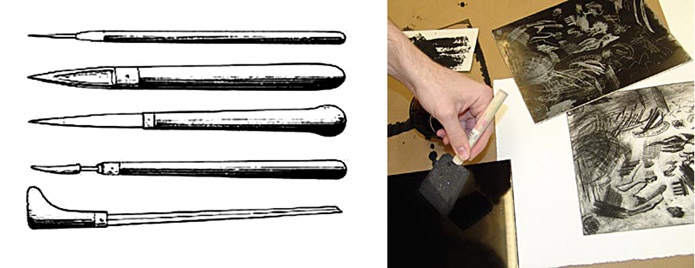
Drawing into a hard ground
Once the hard ground is dry the artist can begin to draw and incise marks into the acrylic surface. The most obvious
choice of drawing utensil would be an etching needle made from tempered steel which enables the artist to create any number of lines, strokes, dots and textures on the plate to suit their pictorial vision for the print. An etching needle is still an essential instrument in etching and is recommended as an inexpensive investment. However, more makeshift tools like sewing needles inserted in a holder are equally well suited for the task. Any tool that is sharp enough will cut into the acrylic ground with ease. It should be held in a fairly upright position and guided with fair but not excessive pressure.
Pressing too hard will produce a drypoint burr which will be attacked by the Edinburgh Etch during biting. All incised marks should be highlighted by the shiny metal surface visible through the hard ground. If some areas look insufficiently opened up it is likely that the etching needle has become blunt and needs sharpening.
Possible drawing utensils:
sharp drypoint needle (have sharpening stones at hand for frequent use)
traditional etching tools such as roulettes etc.
sewing needle inserted in a retractable pencil
razor bladescraper
sandpaper
coarse steel wool
wire brush
small saw blade
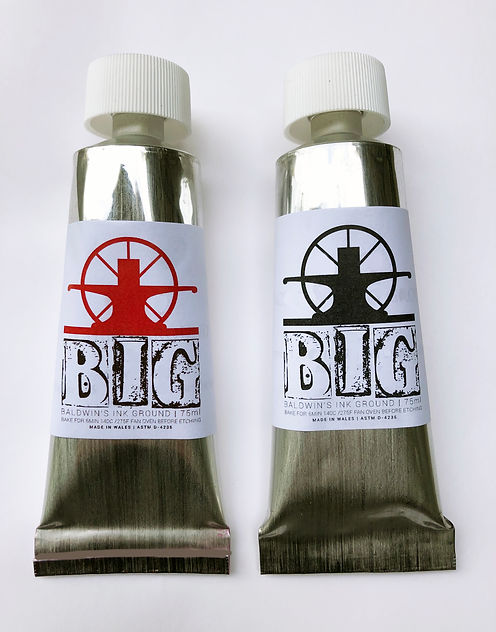
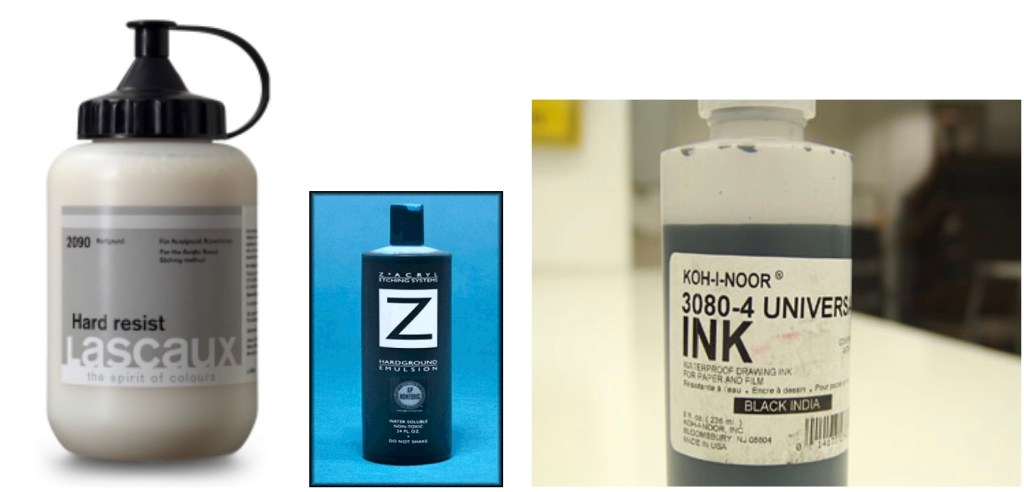
a variety of acrylic hard grounds (BIG / Lascaux) ; Z Acrylic is no longer available
Working with an acrylic hard ground is in no way restricted to the use of just an etching needle. Many instruments or materials can be used to make marks on the smooth surface. A seemingly endless range of effects can be produced by drawing with pieces of steel wool or sandpaper, scraping away the ground with a razor or by using implements like saw blades with which bundled lines can be conjured up in a single stroke. When the ground is broken in this way you should remember that a scraped area, for example, will etch as open bite, whereas anything making narrow marks results in a line bite similar to that caused by an etching needle. Improvised techniques can often enhance the sometimes rather dry character of pure line work.
Another way of producing intaglio marks of different depth and tonal value is to control the length of bite – an option much favoured by Rembrandt. A very faint and delicate line drawn into the hard ground only produces a very faint, delicate, greyish looking mark on the print if the plate is etched for a short length of time – say 5-15 minutes. The quality of this line changes as a result of any further immersion in the bath – after say 40 minutes the eroded groove will have become deep enough to give a black and well saturated line; and after a further 2 hours the line has acquired a rather heavy quality due to the formation of a wedge-shaped groove that is now deeply cut into the metal plate. Due to a degree of lateral biting it will be wider than the original incision in the hard ground. The importance of biting in successive stages as a creative tool cannot be over emphasised. Working in this way enables artists to turn a flat surface into a multi-layered landscape of marks which in turn produces prints of a tremendously versatile and spatial nature.
In hard ground etching this can be achieved by initially drawing the more delicate areas of a design, etching them for a short period then rinsing and drying the plate. After stopping-out these areas i.e. covering them with a mordant resist to prevent further biting, more work can be drawn into the ground and etched for longer to produce richer and darker passages of the overall composition, one step after another.
Stopping-out is usually done by painting stop-out varnish onto the bitten intaglio lines using brushes of a suitable thickness. If areas are stopped-out with floor varnish this gives the artist the added advantage of being able to draw more layers of precise line work onto areas of the plate that have already been etched. The thin acrylic floor varnish does have a tendency to creep into bitten intaglio lines while a thicker stop-out varnish will stay where it is applied.
Very dense cross hatching or similar meshed networks of marks are best produced by etching several successive layers on top of each other rather than by etching in one stage. In this instance, the hard ground would be reapplied in several coats before each stage of drawing and biting. A multilayered bundle of marks will always appear richer and denser on the print than a single layer and is much less likely to turn into shallow open bite in the intersecting areas during long etches.
The creative use of a pure hard ground can make a seemingly simple intaglio method into something much more complex, demanding and exciting.
The liquid acrylic hard ground has several advantages over the traditional wax based method. Aside from the elimination of solvents and airborne carcinogens (from hot plates and plate smoking) there are also creative benefits. The durable acrylic surface is much less prone to the kind of foul biting often found using the wax method. Hard ground plates can be worked on over a period of time and carried around between successive bitings without the surface becoming damaged.
Despite its durability, the acrylic hard ground still presents artists with a surface that is easily broken into by any tool or process and allows a free-flowing drawing action akin to drawing with pen or pencil. All of the soft rolling ground mixtures described in the next section are suitable for use as a malleable hard ground. The ORONO GROUND, developed in collaboration with the University of Maine, in particular has properties remarkably similar to the conventional wax ground.
Roll-on hard ground
The roll-on hard ground also serves as a ground with which areas of a plate that have been under etched can be reworked and deepened. For this purpose the etched plate is oxidised and then rolled-up all over with roll-on hard ground. The stiff acrylic ink will only be deposited on the plate surface while the lower intaglio areas are unaffected by the new coating of resist. After drying, the plate can be immersed in the mordant once more to obtain the required depth of bite.
Some etchers favour a combination of the liquid hard ground and the roll-on hard ground.
METHOD
Apply a roll-on hard ground as follows:
1. Lay on a very thin coat of liquid ground and allow to dry.
2. Roll a thin coat of black roll-on ground on top. Allow to dry.
The resulting plate allows the drawing of very fluid and delicate line work into a deep black surface and yet guarantees maximum corrosion resistance.
For more information on Hard Ground click on the following links: