by Carrie Kaser
I grew up on the Western Slope of the Colorado Rockies and studied at the Rhode Island School of Design, Univerisity of New Mexico, and Tamarind Institute. In 2011 I completed an MFA in Visual Studies at the University at Buffalo, and returned to the Southwest. I currently reside in Albuquerque, New Mexico where I have a printmaking workshop in the old garden house. I make art and teach.
Winning your vote, acrylic on canvas
http://alineonawalk.blogspot.com/?m=1
Polyester plates. Easy as 1, 2, 3, right? Wrong (well, kind of right).
- Draw on your plate with waterproof ink.
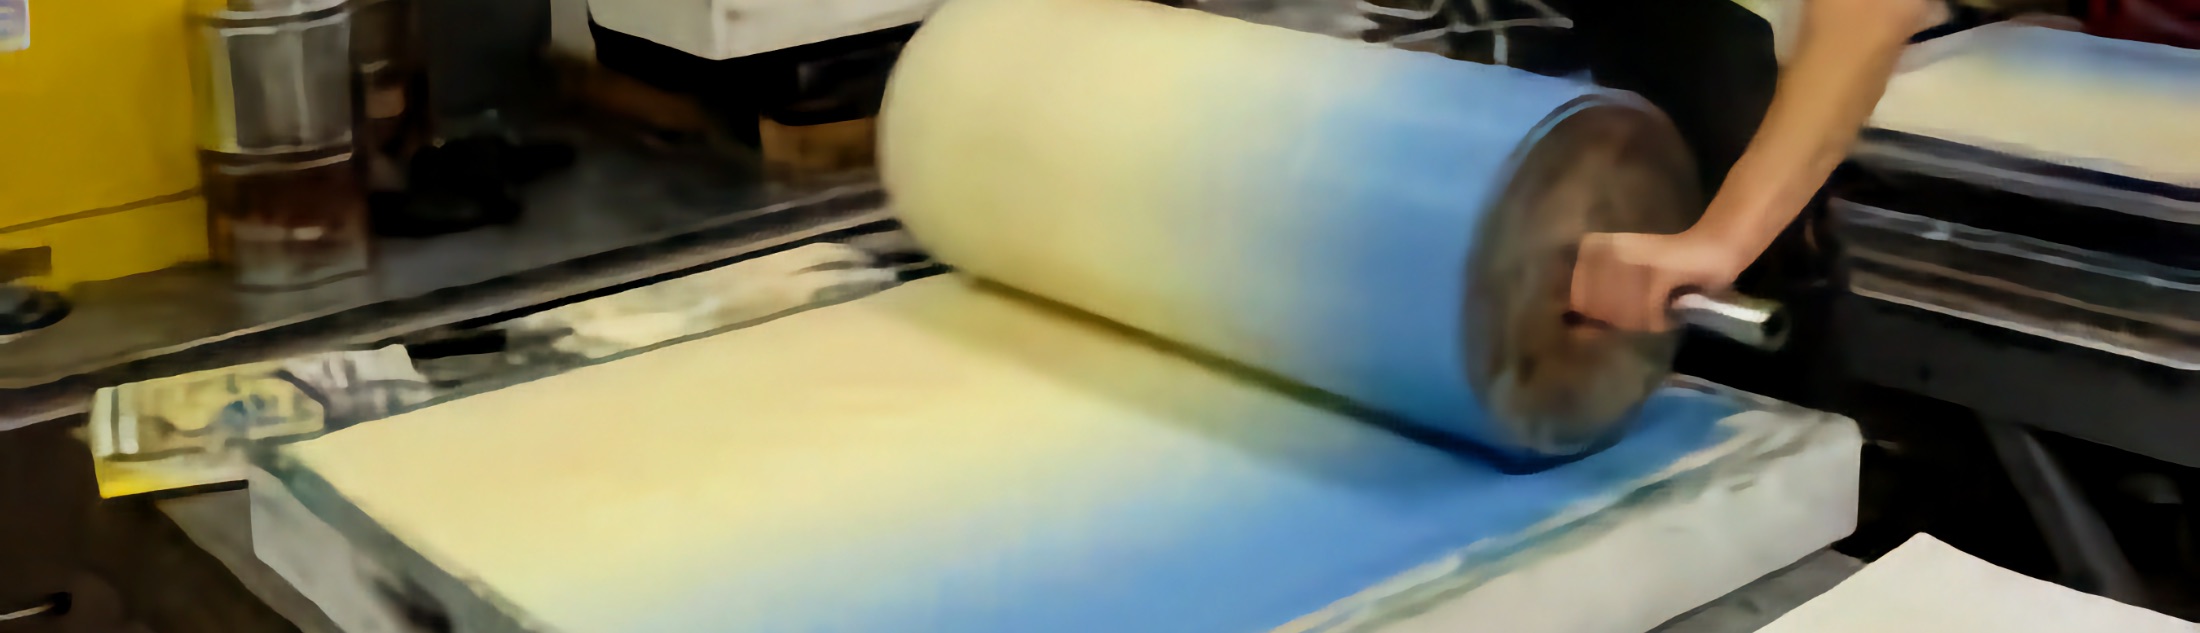
- Sponge and roll ink onto the surface of the plate.
- Try to figure out why this isn’t working.
I ran into some problems with my first few attempts. The idea is simple enough — just like a stone or aluminum plate, the polyester plate holds water while your drawing area (made from some type of waterproof material) will hold oil-based ink.
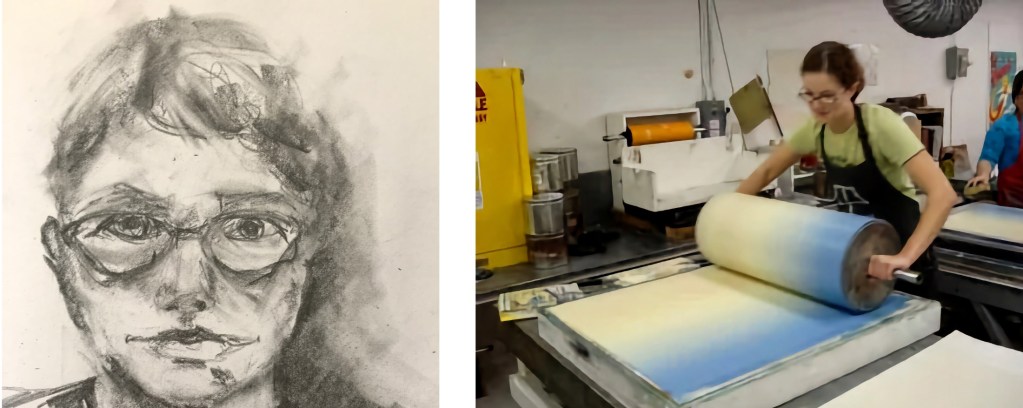
You sponge the plate (it’s really more like a heavy sheet of polyester “paper”) and roll ink across it while still damp. After a few passes you can print it on a litho press or on an etching press.
But… I found that my image would disappear after only a couple of prints. Some materials disappeared after only one pass of ink. So I did this the proper way and made a test plate:

The test plate (after having been drawn and ‘cured’). (Example: cure the plate with a hair dryer, or in the sun).
the sample print
I tried out a bunch of things I happened to have on hand:
Bic Ball Point Pen (fine and medium point)
Zig Opaque Pen
Office Depot blue ball point pen
Pentel Brush Pen
Deco Color Paint Marker (black)
Craft Smart Paint Pen (in silver and black, available at Michael’s craft supply stores)
Krylon Short Cuts paint pen (available at True Value hardware stores)
A regular Sharpie marker (fine tip and broad tip)
Sharpie Industrial (it says “industrial” on the label)
Calli brand calligraphy ink
Lithography ink (yep, straight from the can — Hanco Process Black)
Ace Premium Enamel spray paint (blue)
Rustoleum Protective Enamel (light tan)
Grease Pencil (the cheap kind you find at the hardware store)
Photocopy transfer (see my other post about photocopy transfers)
Photocopy Phiasco (or, what is Emulsion Aggregate copy toner?)
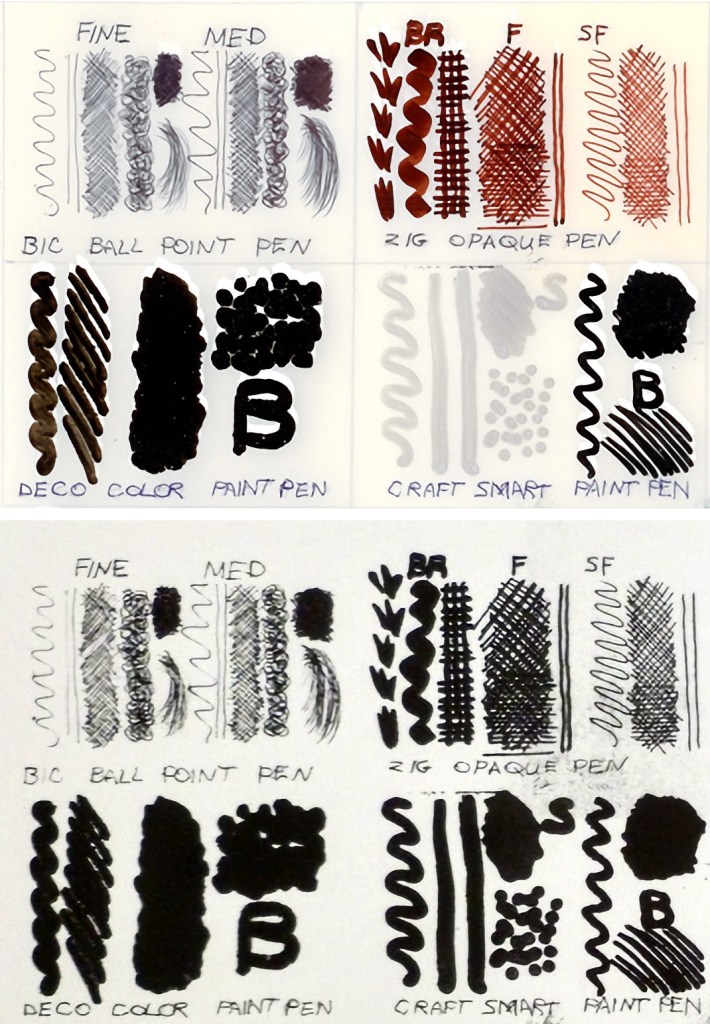
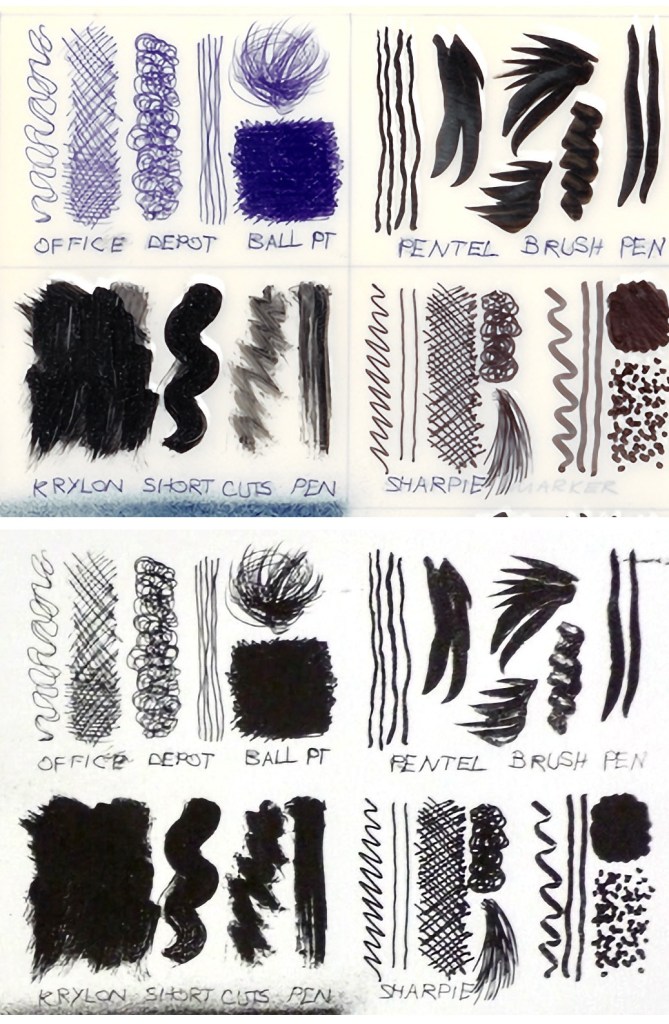
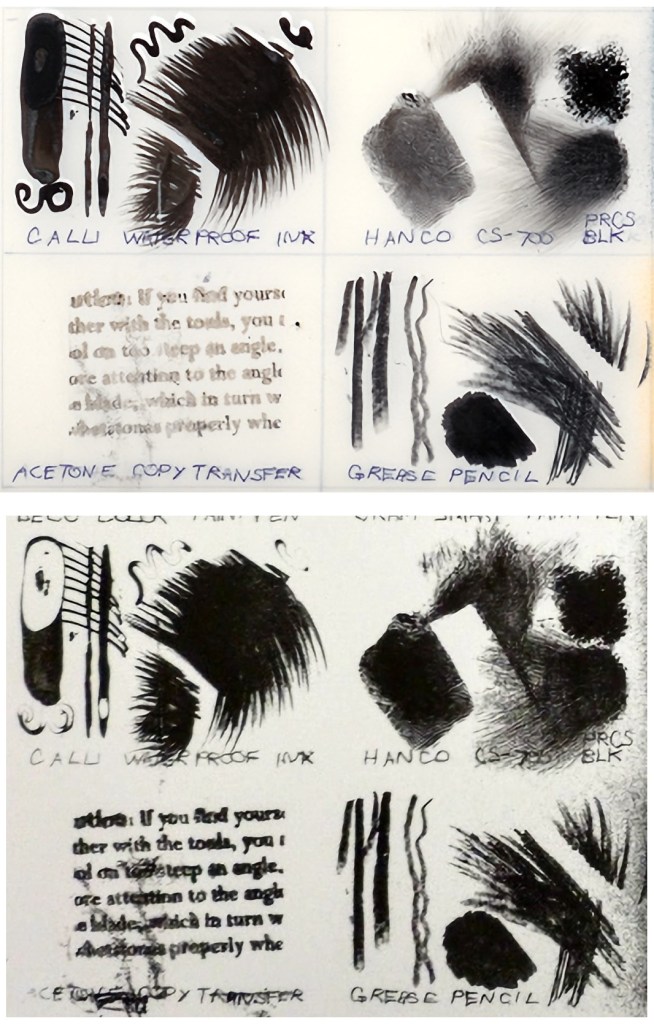
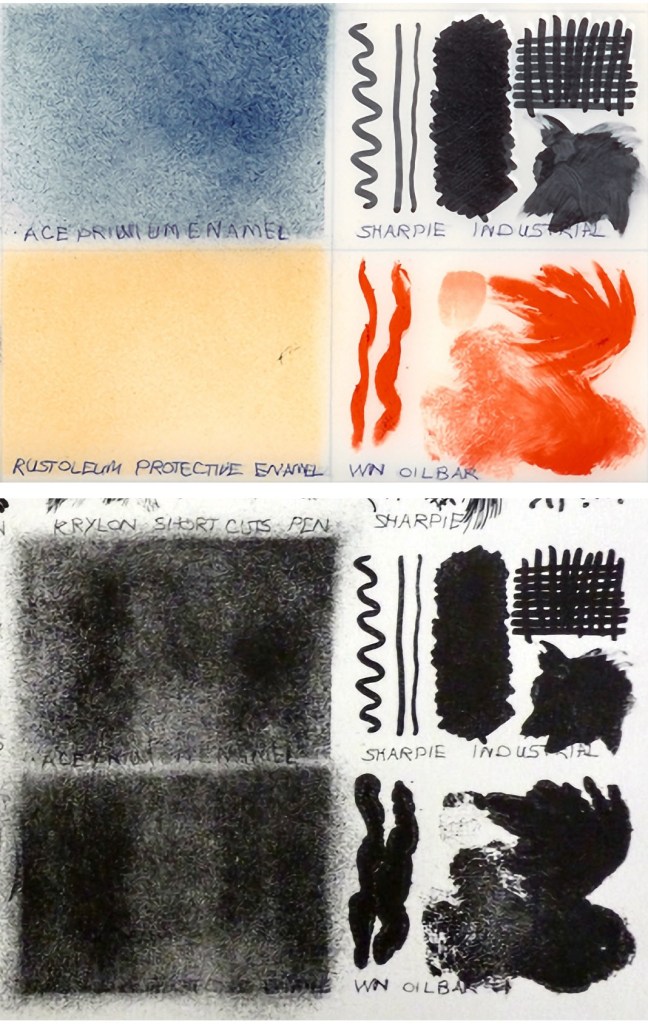
The Results: A Guide to lithographic marks printed from a polyester plate
- top: various drawing tools used on the polyester surface; test plates shown after being drawn with a variety of tools and marks and then heat cured
- bottom: the resulting lithographic print
Mark-Making Test Prints No I
Mark-Making Test Prints No II
Mark-Making Test Prints No III
Mark-Making Test Prints No IV
editorial NOTE: artists often use photocopiers or inkjet printers to transfer existing drawings, artwork, or halftone photographs onto the polyester plate; after heat setting the plate is then printable in the lithographic manner. Some types of ink or printer are much better suited for plate making than others. For instance the Canon waterproof inkjet inksets are better suited than the more water soluble Epson ones. Experiment, and you’ll find a good solution. The HP A3 sized laser printer (HP 5000) also comes especially recommended for polyester plate lithography.
Toner Transfer and heat curing polyester plates
For the past few months I struggled with toner transfers. The older laser printer at UNM worked just fine, but the newer one did not. Copies from Kinkos wouldn’t transfer, either. It was like all of a sudden, the toner was different. The solvent’s I’ve used before (acetone, Citrasolv, or PureCitrus Air Freshener Spray) would not dissolve the toner from the copies. With nothing better to do, I did some internet research.
(Now is when I wish I had a chemistry degree.) It turns out, in the last few years, the companies that make toner have stopped using the crushed plastic particles of the past. The new ’emulsion-aggregate’ (or E-A) toners are grown chemically in a lab. This means the particles are smaller and more uniform (and possibly made of an entirely different plastic).
More about toner particle size and shape: http://www.malvern.com/labeng/industry/toners/shape.htm
So the experiments will continue for toner transfer. When it works, it’s a great way to add text or photographic images onto aluminum plates and polyester plates.
And a Windsor-Newton Oilbar (from the oil painting section)
After making the test plate, I heat-cured the plate in an oven set to 170 degrees (as low as my oven would go) for about 15 minutes. 170 happened to be the perfect temperature — after 15 minutes everything (except the oilbar) was dry and set, and the plate looked fine — there wasn’t any scorching or warping like I experienced last time. I haven’t tried it, but I think a hair dryer or even a cool (170 degrees) iron could also work to heat-cure.
Here’s the full print from the test plate (I used Hanco Process Black litho ink).
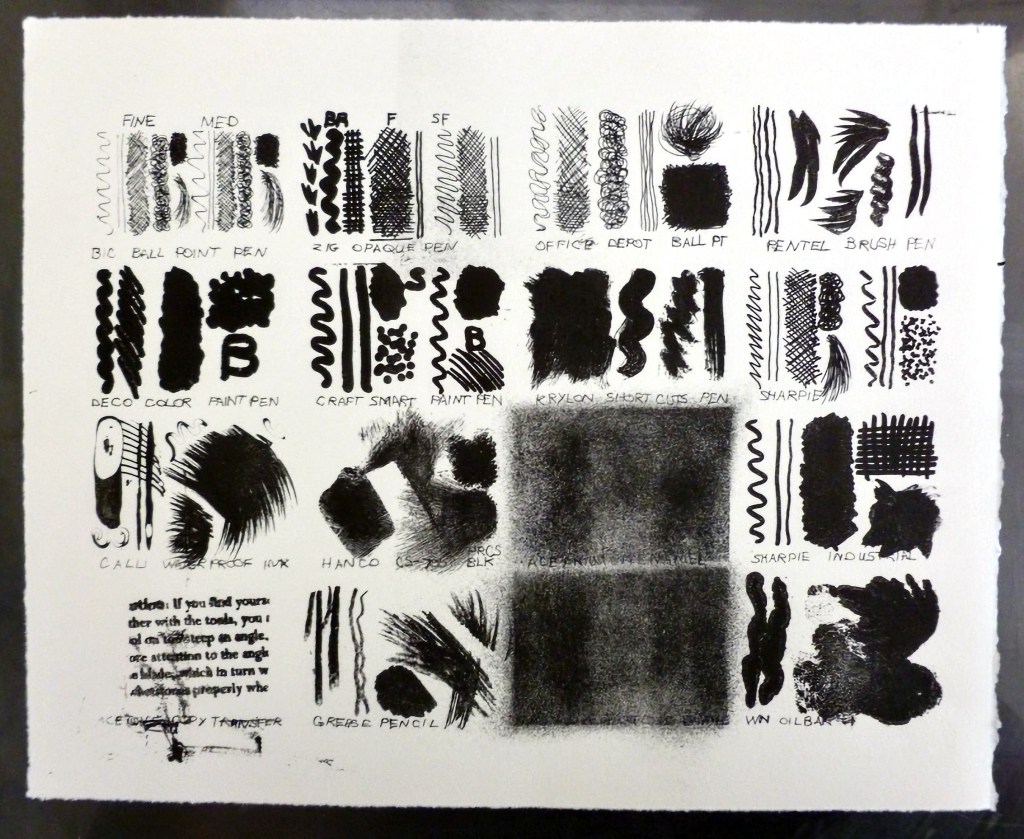
The Results
I really liked working with the ball-point pen. It was easy to draw with and printed nicely. I was really impressed that the Zig Opaque Pens worked as well as they did. I definitely recommend these pens over Sharpie for this technique. The sharpies weren’t too bad; the ‘industrial’ sharpie worked significantly better.
NOTE: avoid using greasy materials on polyester plates; acrylics, inkjet ink or toner work much better.
I was surprised that the oil bar worked at all — it did get darker, and the oil appears to have ‘grown’ some — the lines printed more like blobs. The grease pencil lifted off after a few prints, and especially after cleaning the plate with a toothpaste scrub. The photocopy transfer got much darker than I expected, considering the problems I had with the transfer itself.
In summary — most waterproof drawing materials seem to work.
If the material is soft (like the grease pencil or oilbar) you risk losing the image when you clean the plate. Any drawing material that is applied heavily can crack and flake as the plates are flexible. Heat-curing the plate seems to help the drawing material fuse to the plate well.
Recommended materials:
Bic Ball Point Pen
Zig Opaque Pen
Office Depot ball point pen
Pentel Brush Pen
Craft Smart Paint Pen
Krylon Short Cuts paint pen
A regular Sharpie marker
Sharpie Industrial
Calli brand calligraphy ink (as long as it’s a thin layer)
Lithography ink
Ace Premium Enamel spray paint
Rustoleum Protective Enamel
Photocopy transfer
Not recommended:
Deco Color Paint Marker — this lifted right off the plate after a couple of prints
Grease Pencil — mostly disappeared after cleaning the plate, not very stable
Windsor-Newton Oilbar — too greasy/hard to control drawing. It could work for solid areas in a pinch.
Cheap-o small press (found it on the internet), and my drying rack

Who doesn’t want a tiny, travel-sized press? You never know when you might need to make a print. This is not a great press (not surprised), as they made clear on the invoice. It’s more like a model of a press than a real press, but I was able to pull some polyester plate lithos (and I didn’t even break it). I think it will work fine for printing relief, or maybe even Boxcar Plates. I probably won’t use it too much for intaglio or lithography.
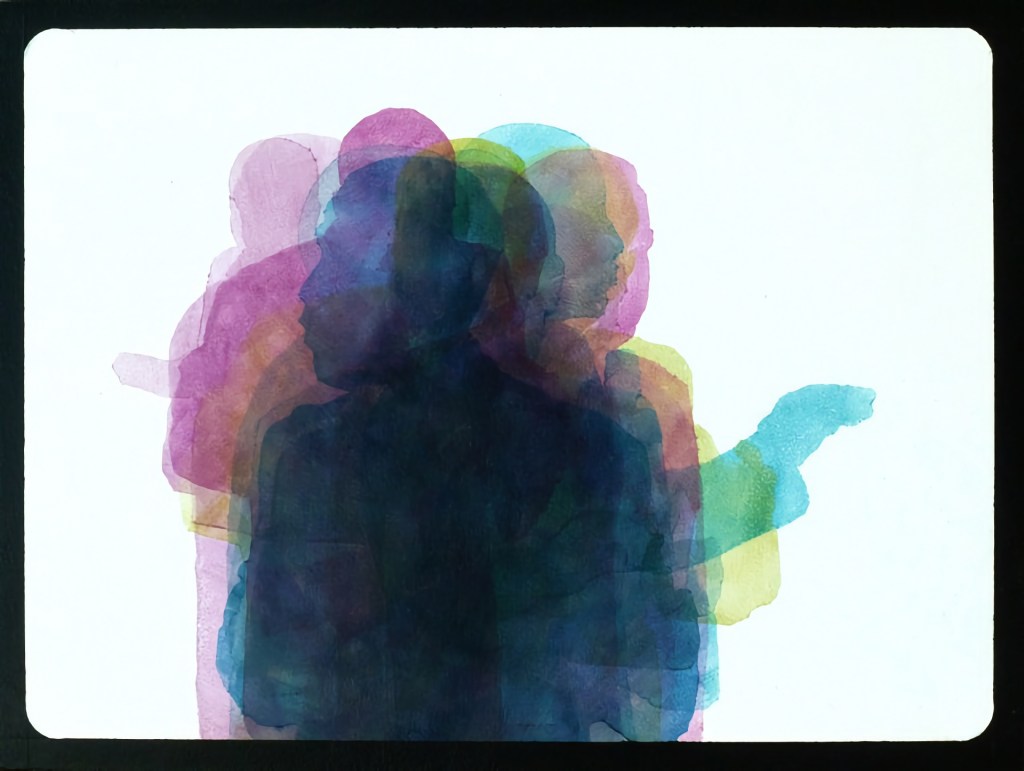
below: two works from my Sunday Drawings series
© Carrie Kaser 2024


more works: tempera paint, 12 x 15 inches, Linocut, 6×8 inches, Relief monotype, 9×12 inches, (both), mixed media on paper 11×15 inches
Full Site Map: a l l p a g e s / t o p i c s