Metal Salt Etching and Acrylic Resist Etching

acrylic resist and metal salt etching
1. Compared to Traditional Intaglio
Traditional Intaglio Etching Chemistry: Intaglio (from the Italian intagliare, to cut) is a category of printmaking techniques that creates depressions in a flat metal plate to hold ink. Intaglio includes engraving, drypoint, mezzotint and aquatint. Etching, the fastest and most preferred technique, requires exposure to toxic chemicals, including nitric acid or Dutch mordant to chemically etch exposed areas of the metal plate, asphaltum and rosin dust as grounds to resist etching and polycyclic aromatic hydrocarbons (PAH) as cleaning and thinning solvents.

Nitric acid etching solution Nitric acid (HNO3) is highly corrosive and creates odorless toxic nitrogen dioxide fumes that are absorbed by the skin as well as by inhalation; the fumes can cause chemical pneumonia with acute exposure or emphysema with chronic exposure. The molecular structure is shown at the right (source: Wikipedia Online Dictionary). Contact of nitric acid with chlorine produces lethal mustard gas! Material Safety Data Sheet (MSDS) information on nitric acid hazards states: Poison! Danger! Strong oxidizer.
Related Pages:
Contact with other material may cause fire. Corrosive. Liquid and mist cause severe burns to all body tissue. May be fatal if swallowed or inhaled. Inhalation may cause lung and tooth damage. Dutch mordant etching solution Dutch mordant contains diluted hydrochloric acid (HCl) and potassium chlorate (KClO3); the molecular structure of hydrochloric acid is shown at the right above the molecular structure of potassium chlorate (source: Wikipedia Online Dictionary). Dutch mordant produces toxic chlorine gas fumes that cause acute respiratory damage.
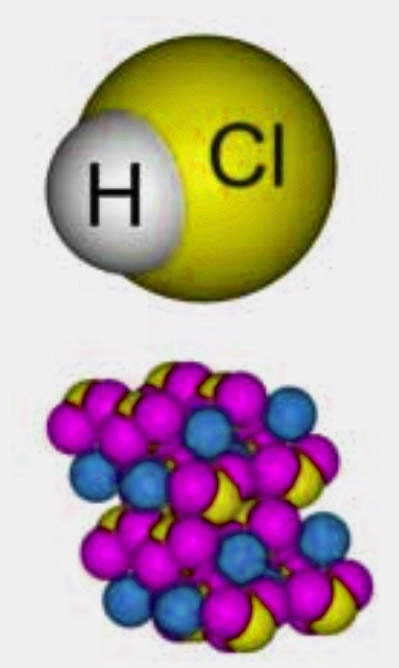
The potassium chlorate in Dutch mordant is a strong oxidizer that can cause fire or explosion. Graphic Chemical & Ink Company, a printmaking supplier, has refused to carry the ingredients for Dutch mordant since the 1980s. Asphaltum and rosin dust resists Asphaltum, a traditional resist, contains PAH which vaporizes above 200°F and is a probable carcinogen. Material Safety Data Sheets says of asphaltum: Vapors may be irritating to nose, throat and respiratory tract. High concentrations cause headaches, dizziness, nausea, drowsiness, anesthesia, and unconsciousness and can result in death. Vapors and liquid can cause eye irritation, redness, tearing and blurred vision…IARC monographs list refined bitumens as possibly carcinogenic to humans based on animal studies.
Rosin dust, the traditional aquatinting resist, is highly explosive according to MSDS. Safer Etching Chemistry Liquid ferric chloride (FeCl3) is a metal salt that produces no toxic fumes. Ferric chloride and The Edinburgh Etch (ferric chloride mordanted with citric acid, a chemical often found in foods) permit safer chemical etching of copper and brass plates. The Saline Sulfate Etching Solution provides a safer etch for zinc, aluminum and steel. Chemists at Rochester Institute of Technology who tested both solutions found that they give off no toxic fumes and permit safe disposal. Liquid acrylics (such as Future or screenfiller), wax, and fat are safer resists. Gum-based Akua inks are safer than oil-based inks.
Vegetable oil and soap are much safer cleaning agents than traditional hydrocarbons.
Metal Salt Etching
2. Edinburgh Etch + Ferric Chloride: Unmordanted Ferric chloride (FeCl3), a metal-salt, is a safer etchant for copper and brass (think: warm-colored etchant for warm-colored metals); etching both in the same tank affects their surfaces but not the prints. FeCl3 generally lasts 2+ years if lidded when not in use to avoid evaporation. It gives off no toxic fumes and permits safe disposal when exhausted. Liquid FeCl3 is safely handled wearing industrial gloves and goggles. Purchase the saturated industrial grade rather than the weaker and more expensive laboratory grade. Use undiluted; it is most effective at 42-48 Baume. Rule of thumb: if it etches too quickly, add water; if too slowly, add ferric chloride.
To remove the ‘sting’ from new solution, dissolve a piece of copper overnight or add a cup of exhausted solution. A disadvantage of unmordanted FeCl3 solution is that it forms a crusty copper hydroxide sediment on the etching plate which impedes further etching unless etched in a vertical etching tank or placed upside down in a tray on supports (to avoid sitting in sludge). Edinburgh Etch adds a mordant/catalyst to FeCl3 to overcome this disadvantage. Important safety rules: Etching iron or aluminum with FeCl3 causes explosive chemical reactions. Avoid crystalline FeCl3 which gives off chlorine gas for six hours after adding water. Avoid heating ferric chloride solution to preclude producing toxic chlorine gas.
Edinburgh Etch = Mordanted/Catalyzed Ferric Chloride
Edinburgh Etch is FeCl3 solution mordanted with anhydrous citric acid (a chemical found in foods) to prevent the crystallization of copper hydroxide. Edinburgh Etch forms no sedimentation and no sludge, so copper or brass plates can be etched face-up in a tray. Edinburgh Etch works twice as fast as unmordanted FeCl3 solution in a tray and four times as fast in a vertical etching tank (approximately 30-40 minutes). Edinburgh Etch is 1 part citric acid solution to 4 parts ferric chloride solution. Citric acid solution is 1 part anhydrous citric acid crystals (available from chemical or food suppliers) to 3 parts hot water by volume. Edinburgh Etch is as safe as unmordanted FeCl3; it produces only copper ions, hydrogen and oxygen.
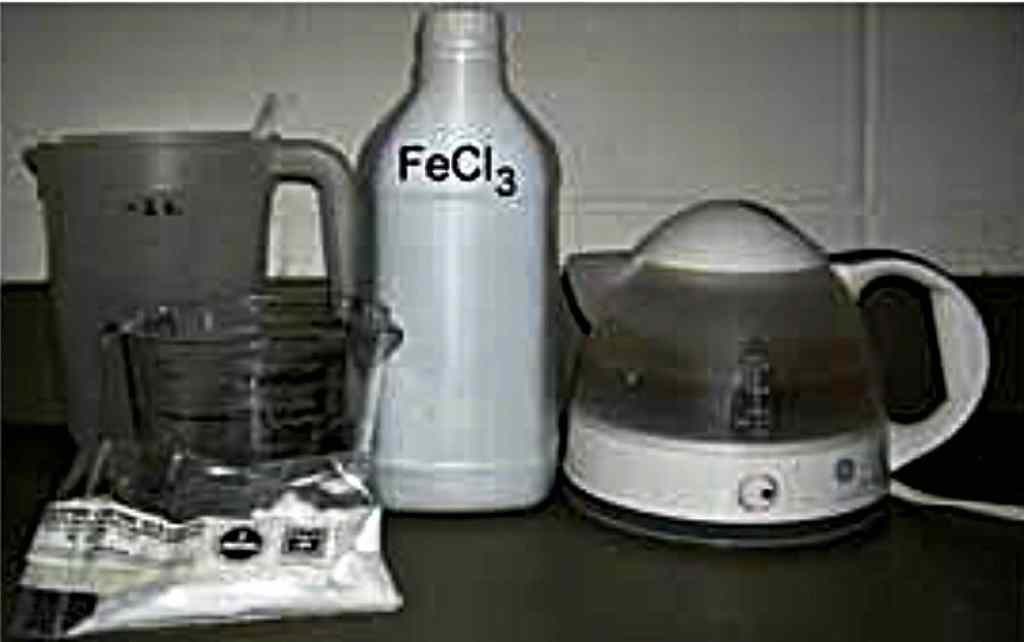
Note: The same important safety rules for unmordanted FeCl3 etching solution apply to Edinburgh Etch! Materials and equipment Preparing Edinburgh Etch requires: measured liter container; plastic spatula; 750 ml water heated in an electrical teapot; 4 liters saturated ferric chloride solution; 250 grams anhydrous citric acid crystals; 1 cup of exhausted solution or a scrap of copper; vertical etching tank or large tray and wooden stirring stick; industrial gloves and goggles.
EDINBURGH ETCH
1 PART CITRIC ACID SOLUTION + 4 PARTS FERRIC CHLORIDE SOLUTION
Edinburgh Etch Recipe: Wear industrial gloves and goggles throughout the preparation. Pour 4 liters ferric chloride solution in a tray or tank. Pour 750 ml hot water in a measured liter container. Add 250 grams citric acid crystals to the hot water; the water will rise to 1 liter. Stir until the crystals totally dissolve; without stirring they will not dissolve, and will leave dots on the etching plates. Pour 1 liter of citric acid solution slowly into 4 liters of ferric chloride, gently stirring.
Remove the ‘sting’ of new Edinburgh Etch by adding 1 cup old solution or dissolving a small piece of copper in the tank overnight. Edinburgh Etch is long-lived Edinburgh etch is a supersaturated solution; it can take as much metal as solution so it last a long time; its weight will eventually double even though the space remains the same! It becomes more viscous over time, but still works.
Lengthen its life by keeping the lid on the tank when not etching or storing in the original ferric-chloride-solution containers when not using for long periods. Eventually, Edinburgh Etch will become exhausted. A simple paper-strip test can determine when to discard the solution and make a new batch. Paper-Strip Test for Exhausted Edinburgh Etch Insert a strip of white paper (approximately 1 x 4 inches) in Edinburgh Etch. The paper strip turns golden in new solution. Over time, Edinburgh Etch turns a white paper strip olive green – the more olive green, the slower the etchant works since the solution contains an increasing number of copper ions. When an inserted strip of white paper turns black-olive green, the solution is exhausted. Remember to save a cup of exhausted solution to remove the sting from a new batch!
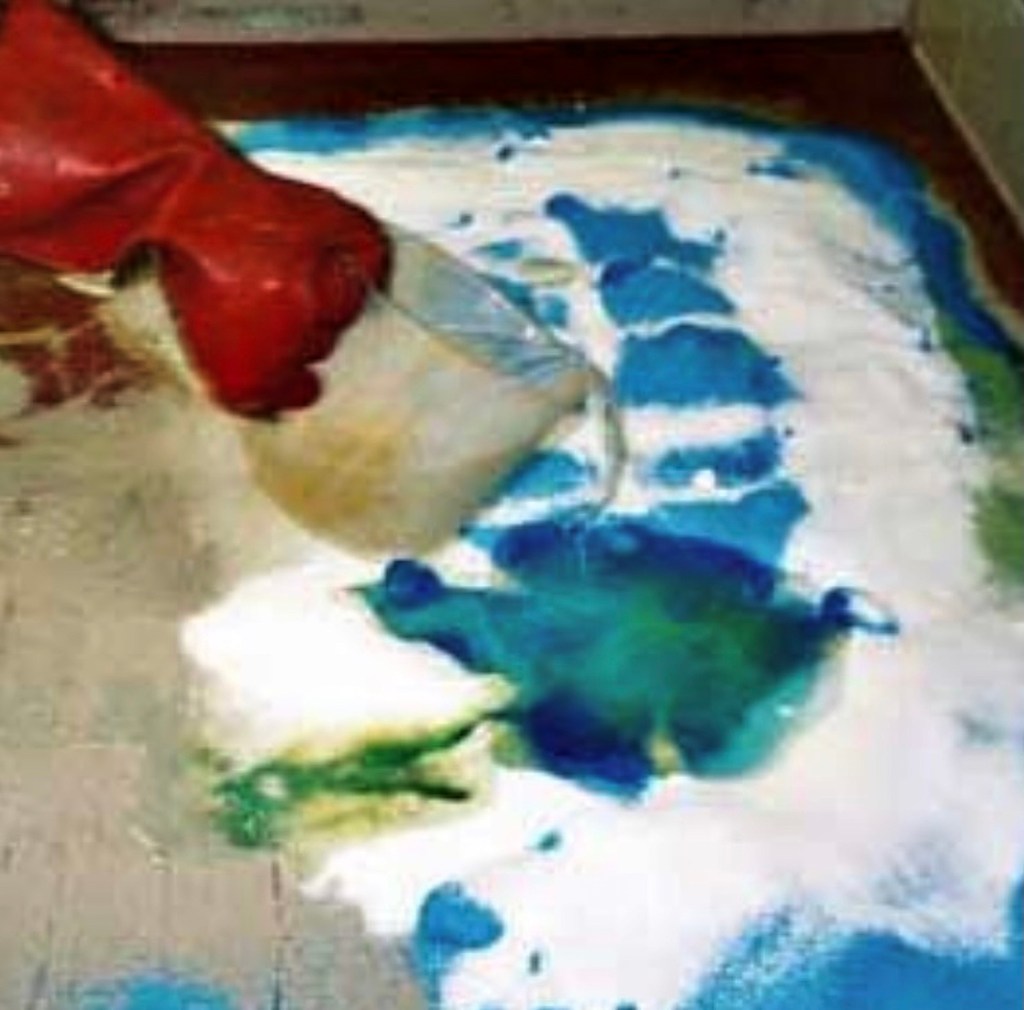
Disposal of Exhausted Edinburgh Etch: Exhausted Edinburgh Etch is slightly acidic so must be neutralized as well as diluted before pouring down the drain to avoid affecting copper plumbing pipes. Concentrated ions are also a marine pollutant. Dilute exhausted solution in a bucket with water. Sprinkle sodium carbonate (also called soda ash or washing soda) to neutralize the diluted solution. Stir with a wooden stick. CO2 gases form as the solution foams; let the solution sit until the foam subsides. Flush the neutralized solution down the sink drain with running tap water – it is mostly iron oxide after dilution and neutralization. Vertical Etching Tank Set-up Plates etch faster vertically in a tank (right) than flat in a tray.

Aeration with a double-tubed aquarium pump further accelerates etching of plates with hard ground or ImagOn resists. Note: do not aerate plates with soft ground or aquatint resists, which are more delicate. Purchase a vertical etching tank (or choose any polypropylene tub deeper than the height of the plate from a local hardware store). Purchase a mid-size (or larger) double-tubed aquarium pump, tubing and two one-way valves from a pet store. Set the pump on a flat surface near the vertical etching tank and near an electrical outlet. Cut two tubes long enough to reach from the pump, travel down the sides of the tank and extend to the center bottom of the tank.
Attach a one-way valve to each tube. Tape the tubes on the side and bottom of the tank so tube ends rest on the bottom of the tank.

The figure (right) represents the aeration set-up. The aquarium pump is located outside the tank. Tubes with one-way valves extend from either side of the pump; the tubes run down the sides and along the bottom of the etching tank. When plugged in, air travels upward from the center bottom of the tank.
De-Oxidant Solution: Always de-oxidize a copper or brass plate each time it is lifted from Edinburgh Etch. Oxidation occurs whenever the plate is exposed to air or water. The oxidation coating prevents further etching if the plate is re- submerged in Edinburgh Etch (or unmordanted ferric chloride solution) and prevents any additional acrylic resists adhering to the plate. Note: de-oxidizing does not adversely affect ImagOn or acrylic resists on the plate.
Materials and Equipment: Preparing the de-oxidant solution requires: a measured liter container; plastic spatula; water heated in an electric kettle; plastic tray or tub; sodium chloride (i.e., common table salt) and vinegar from a grocery. Recipe for De-oxidant Solution Proportions for the de-oxidant are 1 part sodium chloride : 1 part vinegar : 2 parts hot water (heated water dissolves the salt crystals more easily). Mix enough de-oxidant solution to cover the plate.
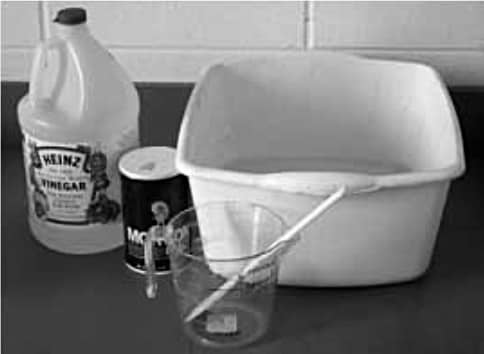
For each liter of solution: Pour 500 ml heated water in the measured liter container. Add sodium chloride to the 750 ml mark and stir to dissolve the salt crystals. Add vinegar to the 1 liter mark. Pour into the labeled tray or container. De-oxidizing a plate After removing a plate from Edinburgh Etch (or ferric chloride), rinse with water. Dip the plate in de-oxidizing solution for approximately 1 minute. Remove the plate and rub it gently with a sponge. Dip again. Note: skip this step for a plate with soft ground or aquatint resist. Rinse quickly to avoid oxidation. Pat dry immediately, then dry thoroughly under hot air or on a hot plate.
Stripping Solution: Strip ImagOn or acrylic resists from an etched plate after the edition is complete in the same manner as non-etch plates. Sodium carbonate (also called soda ash or washing soda) is ideal because it is non-corrosive and results in saponification (i.e., soap) which is not toxic. Stripper is slightly defatting to the skin, so wear gloves. Exhausted solution can be safely discarded down the sink. Materials and Equipment Preparing the stripper requires: measured liter container; plastic spatula; electric teapot; water; polypropylene tank or tub for solution; anhydrous sodium carbonate; paper towels.
Recipe: Proportions are 1 sodium carbonate : 4 parts hot water. For each liter of stripping solution: Pour 800 ml heated water into a measured liter container. Add anhydrous sodium carbonate to the 1 liter mark. Stir to dissolve the soda carbonate. Pour the solution into a labeled polypropylene tank or tub. Insert the etched plate to strip the resist. After stripping, remove the plate. Rinse well with water. Pat dry; heat dry if desired.
Etch Copper and Brass
Metal Salt Etching

1 Copper and Brass Plates:
Plate Preparation Materials and equipment Plate preparation requires: deburring tool; bastard file; palm sander plus 600-grit and 400-grit wet-dry sandpaper; fine steel wool; bonami (or Ajax or Comet); sponge or pot scrubber; paper towels; self-adhesive shelf liner (optional); packaging tape; and blade.
Steps Roofing copper does not need to be beveled. Bevel the edges of a new thicker plate with a deburring tool (or file, scrape and burnish) to avoid harming the press. Soften the sharp corners of a new plate with a bastard file. Plate scratches show in the print. Remove all scratches with the circular motion of a palm sander fitted with 600-grit wet- dry sandpaper. For deep gouges, use 400-grit sandpaper and follow with 600-grit sandpaper. Work wet to avoid the health hazard of creating dust. Rub the plate with fine steel wool to smooth sanding marks.

Resists will not stick to grease or oil, including fingerprints. Rub bonami (which does not contain bleach so is kinder to the environment) or Ajax or Comet with a pot scrubber to degrease the plate. Rinse well. The water should flow equally everywhere. If not, degrease and rinse until no oil remains. Dry the plate with a paper towel; avoid touching the degreased surface.
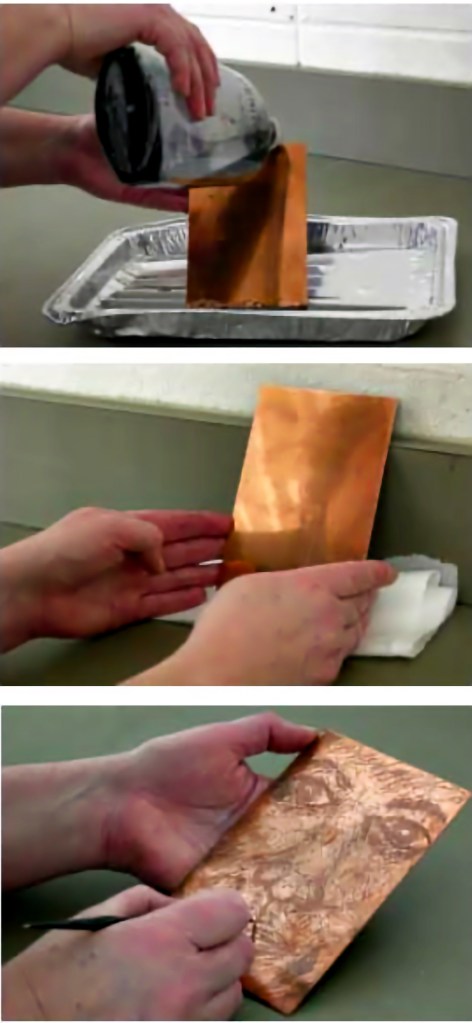
Some printmakers cover the back of the plate at this point; others wait until after the resist has been applied. To protect the back of the plate when etching, cover it with self-adhesive shelf liner or overlapped packaging tape, as in the top photo. Make a long suspension hanger with packaging tape and attach it to the back of the plate, as in the middle photo. Remove excess with a blade, as in the bottom photo. The prepared plate is now ready to apply any of the etching grounds, or resists, described in-depth below. Then follow the etching process in the next topic. Only etch copper or brass plates with Edinburgh Etch (or unmordanted ferric chloride solution). Remember: warm-colored plates with warm-colored etchant.
Standard Etching of Copper and Brass
Prior to etching: fill an aerated vertical etching tank with Edinburgh Etch and prepare de-oxidant solution as described in the Edinburgh Etch topic; prepare the plate according to the previous topic, and apply a ground, or resist, to the degreased front of the plate using any of the techniques outlined below. Etch copper or brass only in Edinburgh Etch; etch no other metals in Edinburgh Etch. The rule is: warm-colored plates in warm-colored etchant. Materials and equipment Etching the plate requires: aerated vertical etching tank fitted with Edinburgh Etch; prepared and backed plate with applied ground; permanent marker; plastic or wooden clothes pin; timer; industrial gloves and goggles; de-oxidizing solution; paper towels; hotplate.
Steps: Leave ImagOn-resist plates overnight.
Heat acrylic-resist plates on a hotplate set at Low for 20 minutes or until all acrylic is dry. Do not heat fat- or wax-resist plates. Suspend the plate in the vertical etching tank with the resist side facing the solution, (top photo). Attach the packaging-tape hanger to the etching tank with a clothespin (second photo). With a permanent marker, write your initials and the insertion time at the top of the hanger. Turn on the aerator; do not use aeration for soft-ground or aquatinted plates. Wear gloves and goggles at all times when handling plates coated with etchant. Lift the plate periodically to check the depth of etching, as in the bottom photo.
As the etchant ages, more time will be required for the same depth. Deoxidize the plate after each removal from the Edinburgh Etch and reinsert as needed for image development. When etching is the desired depth, remove from the etchant. Rinse the plate. Sponge the plate with bonami or dish detergent to begin removing the ground. Rinse. Strip the ground from the plate in stripping solution. When all ground is stripped from the plate, rinse the plate. Blot dry. Heat dry for 15-20 minutes on Low.
Shortly before inking the plate for printing, deoxidize the plate as described in the previous topic; rinse, pat dry; and heat dry the plate. sections. Prepare th e paper, print the edition, dry the prints and label them according to the techniques presented in previous chapters.
Metal Salt Etching
Saline Sulfate Etch Zinc, Aluminum and Steel Plates Zinc, aluminum and steel plates produce rough, unpredictable surfaces with less crisp lines than copper or brass. They are prepared as copper and brass plates but etched in a different solution. Zinc, aluminum and steel plates are cool colored as is their etchant – an easy way to remember the appropriate etchant. Both Bordeaux Solution and Saline Sulfate Solution are safe etchants for zinc, aluminum and steel. Never de-oxidize these plates after etching! Clean them and remove resists in the same manner as for copper and brass. Bordeaux Etch Bordeaux Etch is a copper sulfate etching solution. Copper sulfate is a metal salt used in the Bordeaux wine industry to prevent fungus.
Bordeaux Etch forms a crusty sediment on the etching plate which impedes further etching unless etched in a vertical etching tank or placed upside down in a tray on supports (to avoid sitting in sludge). Saline Sulfate Etch Saline Sulfate Etch is the Bordeaux Etch mordanted with sodium chloride (i.e. common table salt). This is the preferred metal salt etchant for cool-colored metals since the coppery sediment floats to the surface where it does not impede etching. Saline Sulfate Etch etches two to three times faster than Bordeaux Etch, makes a less rough surface, and is less quickly exhausted.
To extend the useful life of Saline Sulfate Etch, skim the surface with a brush or strainer to remove the floating coppery sediment. Even with skimming, Saline Sulfate Etch exhausts more quickly than Edinburgh Etch. When exhausted, the etchant becomes transparent. Zinc, aluminum and steel can be etched in the same tank (unlike copper and brass which need separate solutions of Edinburgh Etch). Materials and equipment Mixing Saline Sulfate Etch requires: industrial or production grade anhydrous copper sulfate (vs. laboratory-grade), sodium
chloride (common cooking salt from the grocery), gloves, goggles, a mask if the copper powder is fine, bucket and wooden stirring stick for mixing, kettle to heat water. Recipe 1 part anhydrous copper sulfate by volume 1 part sodium chloride by volume, 8 parts hot water by volume.
Steps
Wear gloves and goggles when working with powders; wear a mask with fine powders. Mix in a bucket equal parts of anhydrous copper sulfate and sodium chloride by volume. Mark the total height of the mixed powder. Add 4 times as much hot water as powder – further dilution slows etching. Stir well to dissolve powders in the hot water.
Disposal of Saline Sulfate Etch Never put green-colored solution down the drain since copper is a pollutant to marine life. Spent etchant is transparent. It is a weak sulfuric acid so must be neutralized. To ensure all copper ions are drawn out, put zinc strips in the spent solution overnight. Neutralize the spent solution with sodium carbonate (i.e. soda ash or washing soda). Dilute with water. Run tap water while pouring the diluted, neutralized solution down the drain. Note: Crystalline residue of copper sulfate and zinc oxide can be discarded as sludge in trash or dried and recycled by selling to a scrapyard or metal reclaimer.
Etch Zinc, Steel, Aluminum
Metal Salt Etching 5. Acrylic Resists Etching occurs where a plate is exposed to the etching solution. A resist, also called stop out or ground, protects other areas of the metal plate from etching in the etching solution. Traditional resists include asphaltum, which is addictive and toxic, and rosin dust, which is highly combustible, as grounds to resist etching and toxic polycyclic aromatic hydrocarbons (PAH) as cleaning and thinning solvents. Nature of acrylics When wet, acrylics are monomers, or unattached “globs” of plastic suspended in water. The monomers lock into each other to create tough polymers (examples of Dupont polymer chains, left) when they dry. Acrylics cure, or dry, more quickly with heat, which produces stronger bonds, but acrylics eventually dry and bond even without heat. Mixing acrylics together permits taking advantage of different qualities.

The polymers created by drying mixed acrylics differ in appearance under high magnification, but all acrylic polymers are strong. Acrylics as resists Acrylics are preferred as resists for etching. They do not contain organic solvents, which are toxic. They are not easily absorbed into the skin and make no toxic fumes. Removal results merely in saponification. They have strong bonds so they do not easily disintegrate for big editions. Effective acrylic resists include: Hunt’s Screen Filler; Lascaux Screenprinting Paste 2049; Lascaux Acrylic Transparent Varnish 2060; Future Floor Polish; Graphic Chemical’s Water-based Relief Inks – Black #1659 or Carnation Red; acrylic paints – pigments with acrylic as the binder; and ImagOn – the film polymerizes with light exposure as well as heat.
Working with Acrylic Resists Acrylics adhere better when metal plate surfaces are sanded and then degreased. Heat metal plates after applying acrylic resists to speed bonding of the monomers into polymers. Strip acrylics from plates by inserting the plates in a solution of sodium carbonate (1 sodium carbonate: 4 hot water) – the same stripping solution used for ImagOn plates. Most plates also require some scrubbing. Saponification turns the acrylic to soap, which can be flushed down the drain.
Metal Salt Etching
6. Acrylic Soft Ground Resists
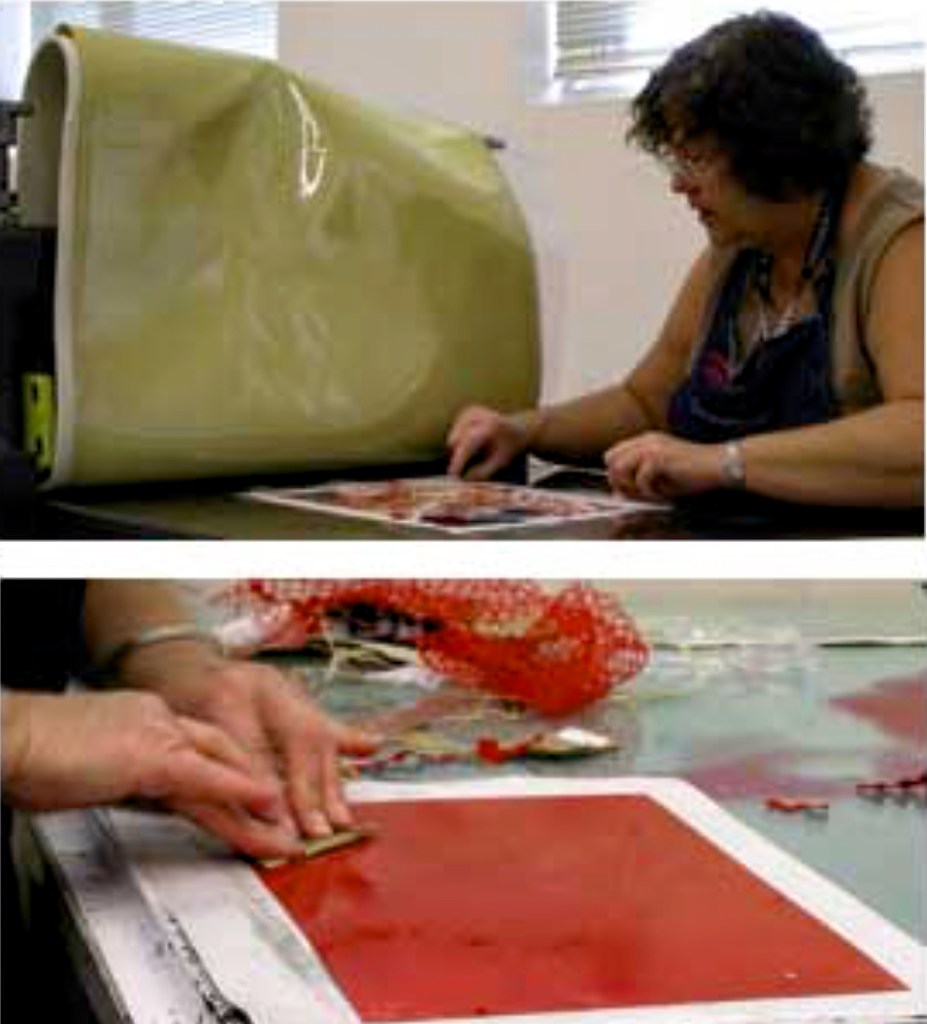
Soft Ground Resist Soft grounds must be worked in a short period of time since they soon dry to become hard grounds. Soft grounds permit (1) imprinting of textures (such as lace, leaves, fabric) into the ground or (2) drawing through paper to produce a soft pencil-like line rather than the precise pen-like line characteristic of hard ground resists.
The drawing or impression exposes affected areas of the plate but remains in place elsewhere on the plate. Orono Acrylic Medium Resist and Texture Imprinting Orono Acrylic Medium stays soft for approximately 20 minutes, during which time it permits transferring a drawing or imprinting of textures.
Materials and Equipment: Orono Acrylic Medium requires: a prepared and backed copper plate; degreased glass inking palette; medium nitril brayer or roller; spatula; Graphic Chemical’s Water Soluble Carnation Red 1656 relief ink; Lascaux Arcrylic Transparent Varnish 2060; Lascaux Screenprinting Paste 2049. Texture imprinting requires: flat textural objects; plastic wrap; Pam; utility knife blade or tweezers for lifting objects.
Steps
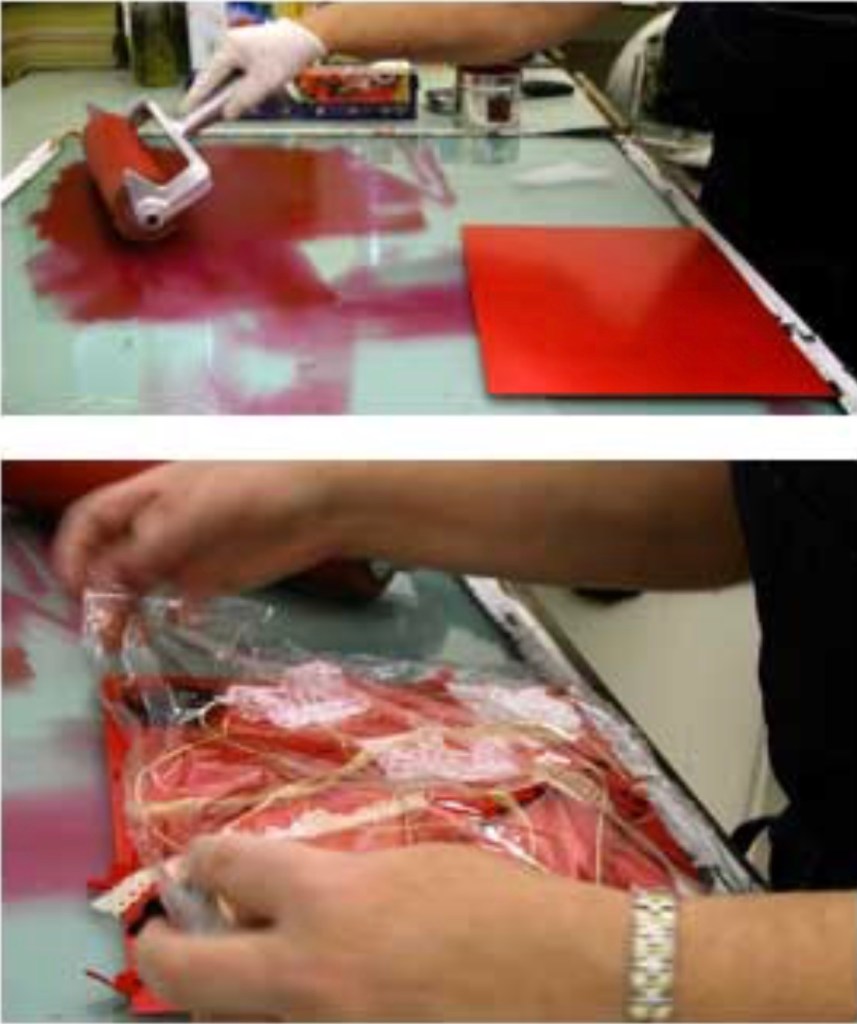
Lay out and blend with a spatula on the inking surface: 3 parts Graphic Chemical Carnation Red relief ink, 1 part Lascaux Acrylic Transparent Varnish 2060, 1 part Lascaux Screenprinting Paste 2049 (an acrylic) to make Orono soft ground medium. Place a tiny bead of Orono on the inking surface, and charge the brayer or roller (top photo). Roll over the plate, recharging as needed. The roll-out should cover the surface smoothly and quietly. Several thin layers are better than one thick layer. Vary roll out direction to reduce lap marks. Produce plate coverage of 80-90% so the copper barely shows through. Work quickly to position textured objects before the soft ground dries (approx. 20 minutes).
Cover with plastic wrap sprayed lightly with Pam and newsprint. Set press pressure one turn less than normal. Run through the press once. Carefully remove a corner of plastic wrap and gently lift an object; if no impression appears, increase the pressure slightly and run through the press again. Copper MUST be visible to etch! The plate should show texture impressions, and a thin layer of ink should show on objects. Carefully remove objects with a blade or tweezers to preserve the exactness of impressions. Add hand-pressed textures at this point, such as a handprint or cardboard with one side removed. Heat dry on a hot plate for one hour.
Etch according to standard procedures with aeration. Clean the roller with Dawn and cold Water. Graphic Chemical’s Water Soluble Relief Inks and Imagery Graphic Chemical’s Water Soluble Relief inks can be used alone rather than as an ingredient for Orono Soft Ground Medium. They take 30+ minutes to dry (longer than Orono – an advantage for transferring a drawing). Orono, a true acrylic, is more durable than water-soluble relief inks, which can be reactivated by etching solution, so etch without aeration.
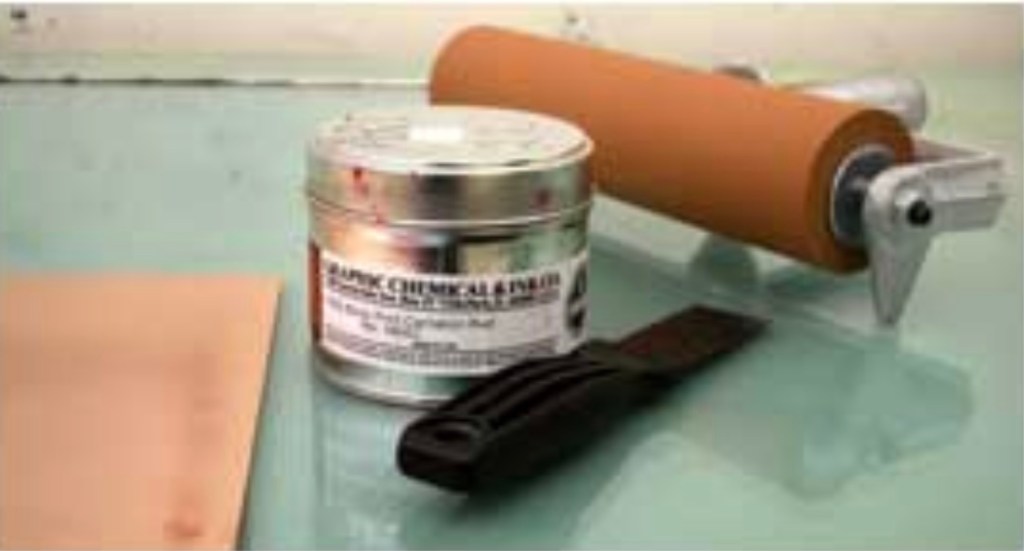
Prefer Carnation Red #1656, which has more finely ground pigments than Black #1659. Avoid Daniel Smith’s relief inks as they take a very long time to dry. Materials and Equipment Relief-ink Soft Ground requires: a prepared and backed copper plate; degreased glass inking palette; medium nitril brayer or roller; spatula; Graphic Chemical Water Soluble Carnation Red #1656 relief ink (top photo) or Black #1659. Soft ground imagery requires a drawing on a lightweight paper or newsprint and 2B, 4B & 6B graphite pencils.
Steps
Spread a bead of water soluble relief ink on the inking palette with the spatula. Charge the roller. Avoid rolling out so much ink that a smacking sound is produced. The roll-out should cover the surface smoothly and quietly. Roll over the plate 2-3 times, recharging as needed. Several thin layers are better than one thick layer. Varying roll out direction reduces lap marks. Produce plate coverage of 80-90% so copper barely shows through. For multiple-plate printing, do not let any copper show through to maintain whites and roll out one plate at a time.
Place the drawing or photo on the plate and quickly transfer the drawing to the plate with the pencils. Check the back of the plate periodically to be sure pencil marks are lifting soft ground. The bottom photo is the underside of the drawing with the lifted Black #1659 soft ground. Dry on a hot plate for at least one hour. Meanwhile, wash the brayer and spatula with Dawn in cool water; hot water sets the ink. Add a suspension handle and etch according to standard procedures. To avoid reactivating the ink, do not use the bubbler for aeration.
Hard and Soft Ground
Acrylic Resist and Metal Salt Etching
7. Acrylic Hard Ground Resists
Hard Ground Resist Non-toxic acrylic replaces the distillate products associated with traditional hard ground etching. Future Floor Polish is the most effective and least expensive hard ground and the only hard ground that gives the characteristic crisp black lines on a print. Alternative hard grounds include any soft ground that has dried.
Materials and Equipment: Acrylic Hard Ground Resist requires: a prepared and backed copper plate; Future; India ink or black air brushing ink; tray to capture poured Future; funnel; mark making tools, such as a drypoint needle, nail, wire brush, scraper, knife edge, or wire pad, etc.; magnesium carbonate Steps Future does not adhere well to an unsanded plate so this step is especially important.
Add a small amount of black air brushing ink to the Future (India ink is shellac based). Pour Future over the top edge of a plate, as in the top photo. Drain on a paper towel for a few minutes and then prop the plate against the wall on a towel, as shown in the middle right photo; or dry the plate flat on a hot plate. When the Future is dry, cut through the hard ground to create the desired imagery, as in the bottom photo.
Note: the longer Future dries, the harder it becomes and the more it tends to chip.
Add a suspension handle and etch for 22+ minutes in aerated Edinburgh Etch. De-oxidize, rinse, pat dry, dry on a hot plate at Low for 20 minutes. Remove the handle. Print with the Future in place to proof the plate. If some areas need more etching, make more marks and/or add Crisco to protect areas for a second etching. Rinse, dry, de-oxidize, rinse, dry, heat dry on a hot plate at Low. Print. The plate has the brightest whites and deepest blacks with Future in place. Remove the ink with magnesium carbonate. Place the plate in sodium carbonate stripping solution (1 part sodium carbonate : 4 parts hot water) to remove the hard ground. Print again. The plate has plate tone in the non-etched areas.
Hard and Soft Ground
Metal Salt Etching
8. Acrylic Aquatint Resists
Aquatint (from aquafortis, Latin for “strong water”, and tinto, Italian for “tone”) is a resist that permits producing an image solely with variations in tone (rather than with lines). Traditionally, a metal plate was dusted with tiny rosin particles and then heated to adhere the particles; acid etched the tiny exposed metal areas between the acid-resist particles. Spraying a fine mist of diluted acrylic on a metal plate with an airbrush produces a range of tones from white to velvety black without the dangers associated with rosin dust.
Set-up for Acrylic Aquatint Resist
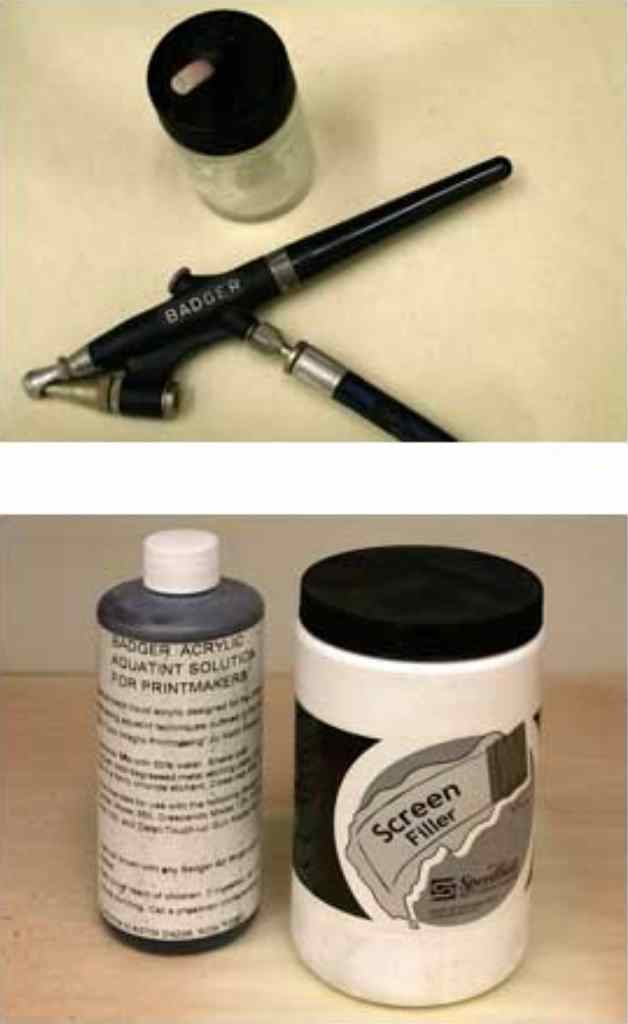
Materials and equipment: Acrylic Aquatint requires: a prepared metal plate; an airbrush (shown right), such as Badger’s Model 350, or Anthem Model 155; a silent air compressor with a reservoir for compressed air; a spray booth with ventilation (or wear a mask); a backboard support larger than the plate and covered with clean newsprint; a straight pin to pierce the airbrush if it clogs; a small container of soapy water; a liquid acrylic aquatint solution.
Recipes:
Acrylic Aquatint Solution
The optional supplies for Acrylic Aquatint Solution are pictured (right). Both need to be diluted for use. Diluted Hunt Speedball Screenfiller: Mix 1 part water to 2 parts Hunt Speedball Screenfiller in a small lidded container. This red solution makes a larger dot, is more difficult to see on the plate, and removes more easily. Work 12-18 inches from the plate with the airbrush nozzle slightly more open.
Diluted Badger Acrylic Aquatint Solution: Mix 1 part water to 1 part Badger Aquatint Spray in a small lidded container. This black solution makes a finer dot, is easier to see on the plate, but is difficult to remove from the plate. Work 18 inches from the plate with the airbrush nozzle just open enough to not constrict the flow.
Using an airbrush:
Work in a ventilated spray booth with the ventilation on (or wear a mask). See the set-up at the right. Prop the backboard against the back wall of the spray booth. Cover the backboard with clean newsprint to enable measuring the mist density. Prop the prepared and backed metal plate against the newsprint. Place a straight pin nearby in case it is needed to unclog the airbrush-Place a small container of soapy water nearby. After each use of the airbrush, insert it in the soapy water and depress the trigger/valve to prevent clogging, as shown (right). –
Whenever the airbrush is not in use, leave it in the soapy water. Shake the chosen acrylic aquatint solution well. Fill the glass jar with the solution. Attach the hose to the airbrush and the glass jar to the airbrush. If you do not leave the other end of the hose attached to the air compressor, attach it now. Plug in the air compressor and turn it on with the gauge set to 30 psi.
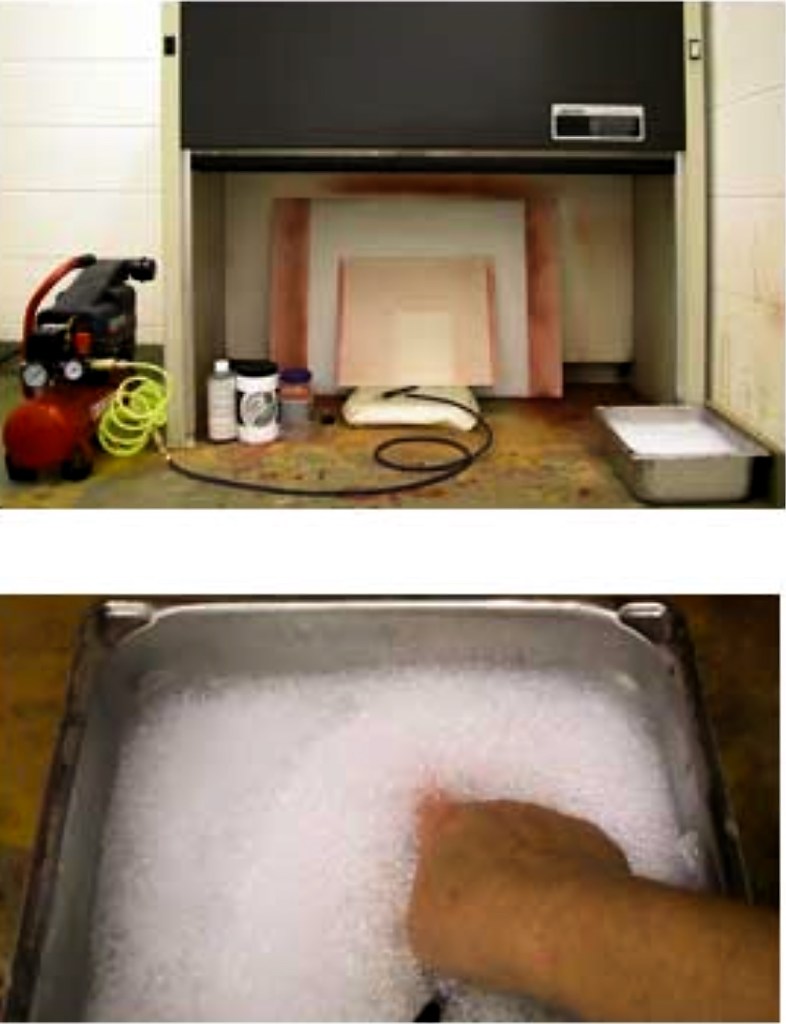
The air compressor shown (below) is Sears 125 psi, 1.5 hp, with a 2 gallon reservoir. Check the spray on a scrap piece of newsprint placed in front of the metal plate. Spray with an even, side-to-side motion, moving slowly from top to bottom. Begin and end each stroke beyond the plate. Stop periodically to check the dot density on the plate and newsprint. When 40% – 60% coverage is reached, insert the airbrush in the soapy water and depress the trigger to blow bubbles. Lift the plate carefully out of the spray booth and lay it flat to dry on a hot plate for about 20 minutes. Clean the airbrush immediately to prevent clogging.

Cleaning the airbrush:
- Return unused acrylic aquatint solution to its container. Wash the glass jar and lid in running water. Fill the glass jar with the soapy water and reattach the jar to the airbrush. Spray onto the newsprint until the jar is almost empty. Then turn the airbrush upside down and continue spraying until the jar is empty. Remove the glass jar and continue spraying air until no water comes out in the spray. Unplug the air compressor and release any water build up. Turn the ventilation off. Return all equipment to its proper storage.
Stage-biting Method:
For Stage-biting, spray a single fine mist of liquid acrylic to cover approximately 40% of a metal plate. The dots of sprayed acrylic resist the metal salt etchant. Working conceptually from white to black, progressively cover areas of the plate with a resist (such as fat, screen filler or Future) and etch again. The longer an area remains exposed for etching, the deeper the etch and the darker the tone produced.
Materials and equipment: Acrylic Aquatint requires: a prepared metal plate; an airbrush, such as Badger’s Model 350 or Anthem Model 155; a silent air compressor with a reservoir for compressed air; a spray booth with ventilation; a backboard support larger than the plate covered with clean newsprint; a straight pin to pierce the airbrush if it clogs; a small container of soapy water (10% ammonia); Hunt Speedball Screenfiller diluted 4 parts screenfiller to 1 part water as the acrylic aquatint solution; Crisco as a stop out.

Steps
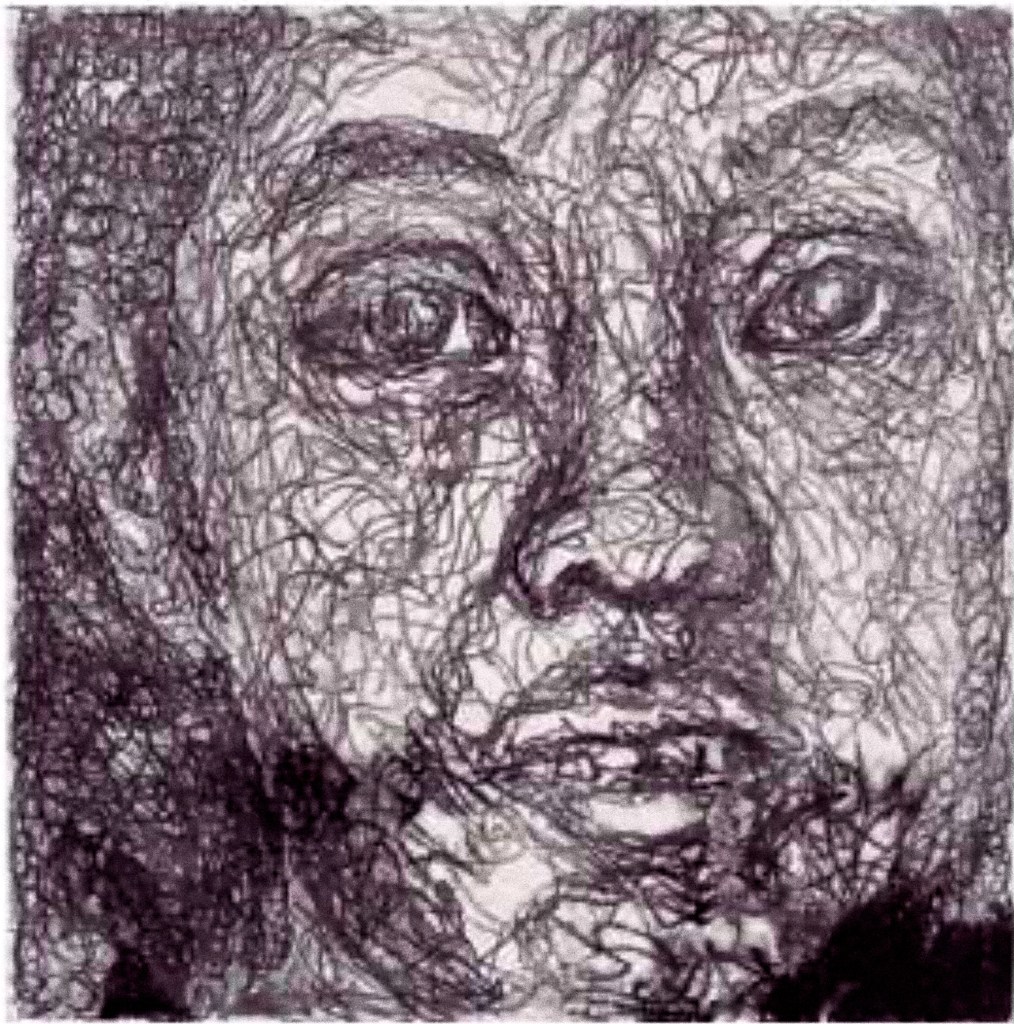
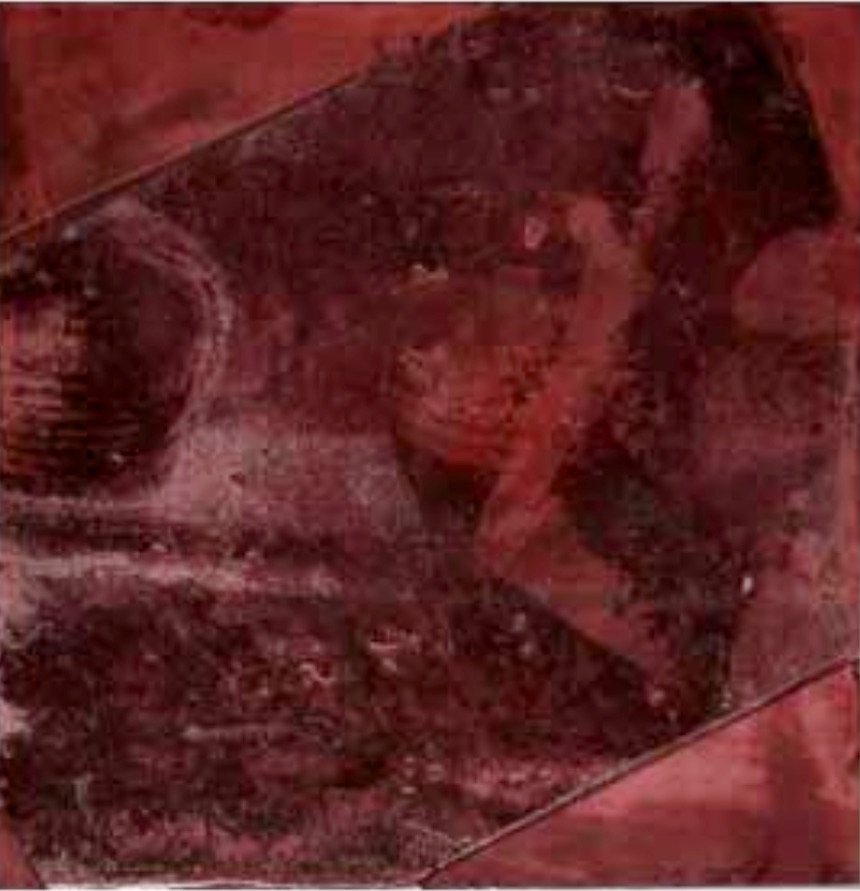
Prepare a copper plate for etching: sand with 600 grit wet/dry sandpaper and degrease. Back the plate with overlapping strips of packaging tape and apply a tape handle. Spray for a 40% coverage with medium dots; closer than that does not provide enough open space between dots for the blackest blacks. Spray only once! Normally heat dry for 20 minutes but fat cannot be heat dried so let the plate sit for an hour. Apply fat with a brush or finger to areas that are to remain white. Etch in Edinburgh Etch Solution for 30-40 seconds without the bubbler. Never use a bubbler with this process until the last etch as the sprayed resist is too delicate. Remove from etchant and submerge gently in a tray of tepid water to rinse. Pat dry. Apply fat to preserve light gray areas. Etch for 2 minutes.
Rinse and dry as before. Apply fat to preserve slightly darker gray areas. Etch for 4 minutes. Rinse and dry as before. Apply fat to preserve even darker gray areas. Etch for 8 minutes. Rinse and dry as before. Continue in this manner. Finally, stop out all but the areas to be black. Etch in Edinburgh Etch solution to complete a total etching time of 40 minutes. De-oxidize. Wash with bonami and warm water to remove the fat stop out; rinse. Place in stripping solution to remove the acrylic aquatint resist. Wash, rinse, dry, heat dry on a hot plate. The print (right) was made using this method.
Single-biting Method:
For a single etching, spray a single fine mist of liquid acrylic to cover approximately 40% of a metal plate. Let the plate dry, then block out areas to remain dark and spray again.
The more an area is sprayed, the whiter it becomes. Stencils can be made from masking tape, frisket film or contact paper that has been pressed against cloth to reduce the stickiness. Objects can be laid on the plate and adhered temporarily with masking tape if they are lightweight.
Materials and equipment: Acrylic Aquatint requires: a prepared metal plate; an airbrush, such as Badger’s Model 350 or Anthem Model 155; a silent air compressor with a reservoir for compressed air; a spray booth with ventilation; a backboard support larger than the plate covered with clean newsprint; a straight pin to pierce the airbrush if it clogs; a small container of soapy water (10% ammonia); Badger Acrylic Aquatint Solution diluted 1 : 1 with water; china marker, toothbrush, Hunt’s Screenfiller; objects; toothbrush.
Steps:
- Prepare a copper plate for etching: sand with 600 grit wet/dry sandpaper and degrease. Back the plate with overlapping strips of packaging tape and apply a tape handle. Spray for a 50% coverage with fine dots; closer than that does not provide enough open space between dots for the blackest blacks. Let the plate dry completely.
- Add stencils to protect areas that should be the darkest and spray again. Repeat as needed for the design. Make marks with a China marker, if desired. Dip objects in Hunt’s Screenfiller, wipe on a sponge, and then apply, e.g., the ends of masking tape rolls. Screenfiller can also be flicked off a toothbrush for a dotted effect. Dry the plate on Low heat.
- Etch in Edinburgh Etch only once – for approximately 40 minutes. Never use a bubbler with this process until the last etch as the sprayed resist is too delicate. Remove from etchant and submerge gently in a tray of tepid water to rinse. Pat dry. De-oxidize.
- Wash with warm water to remove as much acrylic as possible. Badger Acrylic Aquatint Solution is especially difficult to remove, so strip it from the plate in a strong solution of sodium carbonate (1 part soda ash : 4 parts water by volume). Rinse, wash, rinse, pat dry, heat dry. The plate is ready to print.
Metal Salt Etching
9. Aquatint
Pre-thinning Photo-emulsion Stencils: ImagOn photo-emulsion makes an effective stencil for photoetching. For bitmap, text, line art or halftone transparencies with resolution less than 120 ppi, the emulsion does not need to be thinned. Halftone transparencies with higher resolution require pre-thinning the photo-emulsion; without pre-thinning, the dots would be too close together to permit etching.
Materials and equipment: Pre-thinning requires: ImagOn supplies; a prepared copper plate; a halftone transparency printed with resolution higher between 120 and 1440 ppi; standard exposure equipment; standard developing chemistry; fresh developer (i.e., not previously used); talcum powder; etching materials.
Steps: Laminate ImagOn-Ultra to a prepared copper plate and heat the plate to promote adhesion. Leave overnight. Develop the plate in clean, normal-strength developer; at the end of 7 minutes, wipe the surface with a paint carder. Rinse the plate in a tray of water rather than spraying water – this is gentler on the film. Rub vinegar to stop development – do not use the squeegee to remove vinegar; hand wipe it off. Pat dry; heat the film surface with a hair dryer to improve lamination. Rub talcum powder on the film to protect the transparency during the next step; remove excess talcum so only a light coating remains.
- Lay the emulsion side of the halftone transparency on the talc surface of ImagOn-Ultra. Expose about 25% – 30% less than the normal image exposure since pre-thinned emulsion does not require as much light to harden it. Develop for 2 minutes in regular-strength developer. Transfer the plate to clean half-strength developer. Rub gently with a sponge for an additional 30 seconds. Wipe off with a paint carder to remove any tiny bits of ImagOn-Ultra from the plate – they would impede etching. Rinse gently in a tray of water; spray vinegar; hand-wipe the vinegar off; pat dry; heat to stabilize the ImagOn- Ultra.
- Back the plate with shelf-liner or packing tape and make a tape handle. Etch for 2 minutes; remove and check for a brown color on the plate – a clue that the etchant is working. If the etchant on the plate is brown, etch for approximately 40 minutes, checking periodically. When etching is the desired depth, remove from the etchant. Rinse the plate.
- Sponge the plate gently with dish detergent. Rinse. Blot dry. Leave overnight. Make a few prints with the plate. Strip the ground from the plate in stripping solution. When all ground is stripped from the plate, rinse the plate. Blot dry. Heat dry for 15-20 minutes on Low. Print again. Note: prints with ImagOn in place will lack plate tone and print with more contrast.
Metal Salt Etching
10. Photo-emulsion Text Stencils
ImagOn photo-emulsion makes an effective stencil for photoetching. For bitmap, text, line art or halftone transparencies with resolution less than 120 ppi, the emulsion does not need to be thinned prior to exposure with a prepared transparency and an aquatint exposure is unnecessary.
Materials and equipment Etching with photo-emulsion text stencils requires: ImagOn supplies; a prepared copper plate; a transparency printed with bitmap, text, line art or halftone image with resolution no higher than 120 ppi; standard exposure equipment; standard developing chemistry; fresh developer (i.e., not previously used); etching supplies.

Steps to prepare the text image : Adjust Levels to strong contrast (top photo). Make the resolution less than 120 ppi (second photo). Choose a transparency that makes a hard dot and holds a lot of ink, as Azon 787N. Print the inkjet transparency with these settings, if available: Media Type: Ink Jet Back Light Film, Color: Black, Print Quality: Superfine 1440 (never higher than this), Halftoning: Error Diffusion, Microweave: On.
Steps for etching: Lay the emulsion side of the halftone transparency on a prepared laminated ImagOn-Ultra plate.
- Make an image exposure as usual. Develop the ImagOn-Ultra plate for 9 minutes in clean, unused developer. Transfer to a second tray of clean developer. Wipe developer with a paint carder to remove any tiny bits of ImagOn from the plate that would impede etching.
- Rinse gently in a tray of water; spray vinegar; hand-wipe the vinegar off; pat dry; heat to stabilize the ImagOn-Ultra. Leave overnight. Back the plate with shelf-liner or packing tape and make a tape handle. Etch for 2 minutes; remove and check for a brown color – a clue that the etchant is working. If the etchant is brown, etch approximately 40 minutes, checking periodically. When etching is the desired depth, remove plate from etchant. Rinse the plate. Strip the ground from the plate in stripping solution. Rinse. Blot dry. Dry on a hot plate on Low.
Metal Salt Etching
11. Photo-emulsion Bitmap Stencils

ImagOn photo-emulsion makes an effective stencil for photoetching. For bitmap, text, line art or halftone transparencies with resolution less than 120 ppi, the emulsion does not need to be thinned prior to exposure with a prepared transparency and an aquatint exposure is unnecessary. Materials and equipment Etching with photo-emulsion text stencils requires: ImagOn supplies; a prepared copper plate; a transparency printed with a bitmap image with resolution no higher than 120 ppi; standard exposure equipment; standard developing chemistry; two trays of fresh, unused developer; etching supplies. Prepare the bitmap image Increase contrast in increments (i.e., repeat step 4 times): Filter > Texture > Grain > Regular (See top figure).
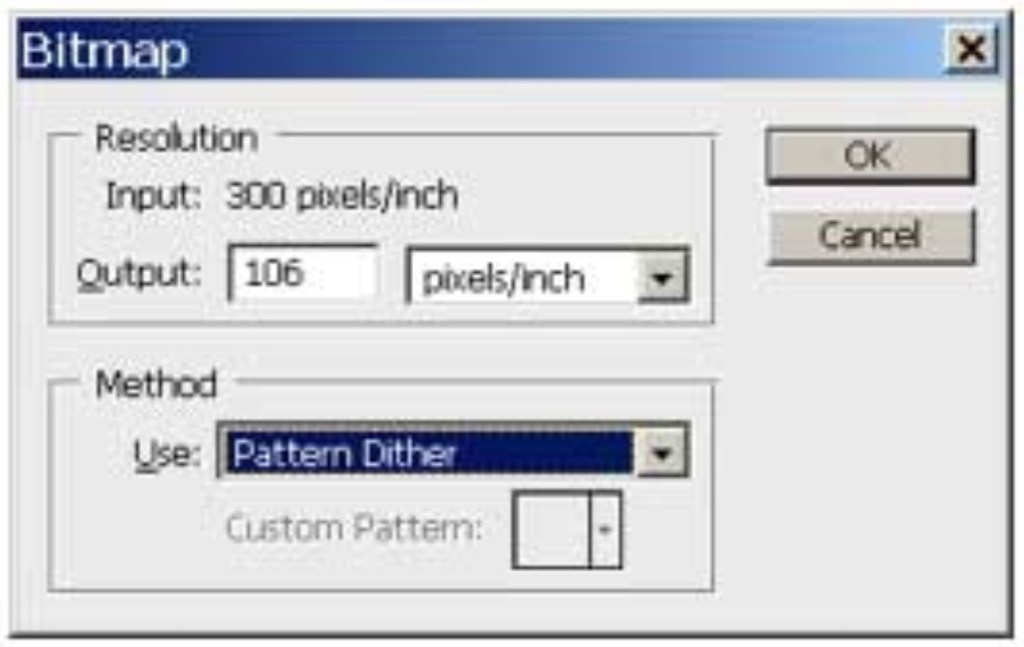
- Convert to a bitmap image: Image > Mode > Bitmap > Method: Pattern Dither and Resolution Output 106 ppi (See second figure). Notes: Bitmap converts a tonal image to graphics so grays are translated as dots without any tonality; this increases contrast. Pattern dither is more random than halftone dither. Any resolution less than 120 ppi works. Choose a transparency that makes a hard dot and holds a lot of ink, as Azon 787N. Print the inkjet transparency with these settings, if available: Media Type: Ink Jet Back Light Film, Color: Black, Print Quality: Superfine 1440 (never higher than this), Halftoning:
Error Diffusion, Microweave: On.
- Steps for etching Lay the emulsion side of the halftone transparency on a prepared laminated ImagOn-Ultra plate. Make an image exposure as usual. Develop the ImagOn-Ultra plate for 9 minutes in clean, unused developer. Transfer to a second tray of clean developer. Sponge for 30 seconds, or until the plate has some areas without a blue tint.
- Wipe with a paint carder to remove bits of ImagOn from the plate that would impede etching. Rinse gently in a tray of water; place in a tray of clean vinegar; hand-wipe excess vinegar; pat dry; place on hot plate at Low for 30 minutes. Leave overnight. Back the plate and make a tape handle. Etch for 2 minutes; remove and check for brown color – a clue the etchant is working. Etch for approximately 30 minutes, checking periodically.

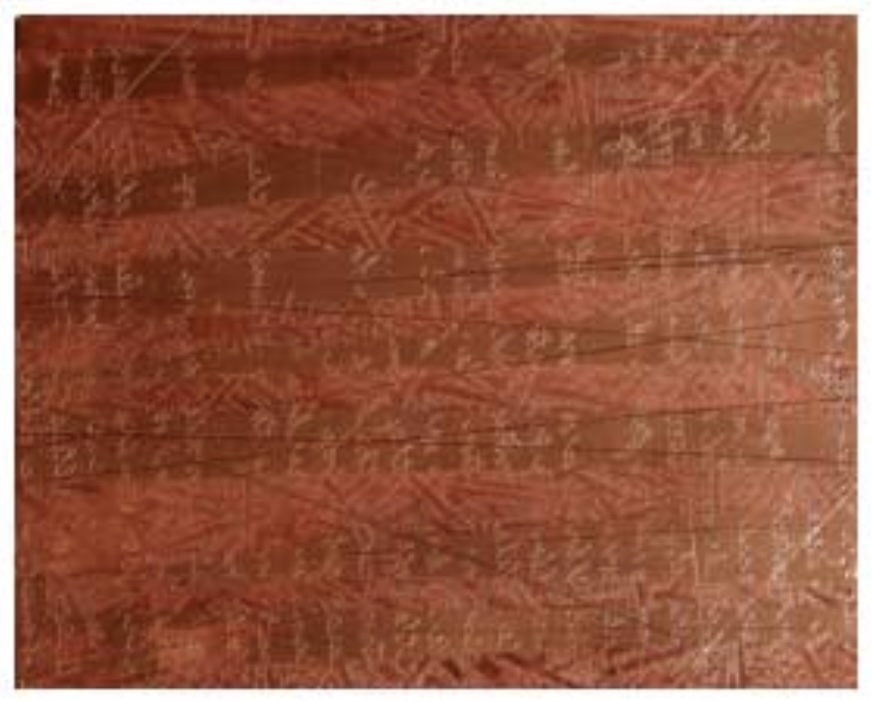
When etching is desired depth, remove plate from etchant. Rinse. Remove the emulsion in stripping solution. Rinse. Blot dry. Dry on a hot plate on Low. The brass plate (right) is the result of reworking. Open bite areas from the original etching required reworking with an acrylic aquatint resist. After the aquatint resist was dried on a hot plate for 1 hour, fat was painted on areas to be protected. The plate was etched another 20 minutes. Flat- black areas in the print resulted from the reworked aquatint etch; dotted areas resulted from the original photo-etch.