Making a Digital Half-Tone Transparency
by Indrani Nayar-Gall

Digital Half-Tone Intaglio-Type
Digital halftone is a way to convert continuous tones of an image into a random dot pattern. This method enables one to expose an image on ImagOn without the help of an aquatint screen. If the final image is exposed at 100% dot structure, the dots will be so dense that the image will burn out, It is, therefore, important to carry out tests to find out the correct density of dot structure.
Indrani Nayar-Gall
Star-Catcher, 2005
4-color photo Intaglio Type
14 x 11 inches
Dot Test
MATERIALS
Products and Equipment needed to make digital half-tone Intaglio-Type:
- Macintosh computer
- Epson Stylus high-end printer – preferably 3000/4000/7600
- Transparencies
- Laminated plates
- Platemaking and developing equipment
note: ImageOn film may be substituted with other dry photopolymer films; more recent models of large format Epson inkjet printer will also work (required: a minimum of two black ink cartridges in the ink set)

METHOD
Make digital half-tone Intaglio-Type as follows:
1. Open a new file in Photoshop and name it Dot Test
2. Go to Select menu and scroll All. Make sure the Foreground/Background icon in the toolbox is set with Black as the foreground color and White as the background color.
3. Select Gradient tool and ensure that the Linear gradient is selected.
4. Press and drag the Gradient tool from the top of the marquee to the bottom and release.
5. Go to image menu and scroll to Adjustment and select Posterize in the submenu.
6. Next change the default level 4 in the dialogue box to 20, click OK. This action will break the gradient into 20 distinct tonal areas with 100% at the top and 0% at the bottom.
7. Place an Ink Jet transparency in the printer. Select the File menu and scroll to Print with Preview; check page set up, then click Print.
8. In the dialogue box scroll to Print Setting and click photo quality glossy film and select the same in the printer, next click Advance Setting and change to 1440 dpi, click Black Ink, Super and then Print.
9. After the transparency is printed, laminate a plate with ImagOn, expose the transparency to the film once a correct exposure time of the film and the unit is established, develop and print.
10. The best dot structure is one that has a 75-80% black dot. Dot structure can be examined with a hand held microscope.
Enhance your image as follows:
Before making a transparency it is important to ensure that the depths and highlights of the image is at the optimum level. This will ensure the crispness of the tones and will help to create required intensity of blacks and whites in the prints.
Open the image in Photoshop, the photograph will look a bit faded.
Go to the Image menu and scroll to Adjustments.
Select Levels in the submenu.
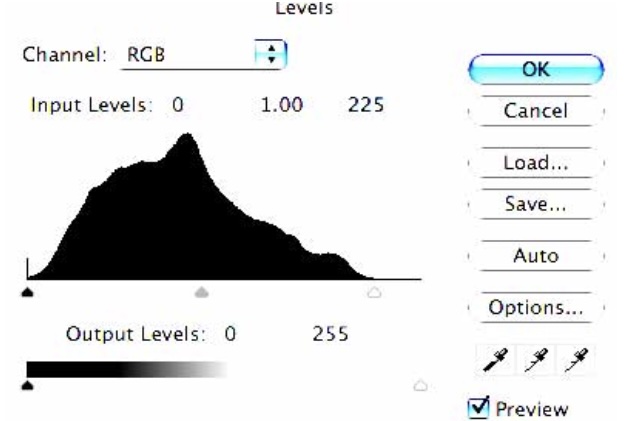
When the dialogue box appears move the left slider (black) to the right until it is just inside the large hump. Next, move the right slider (white) to the left, until it just inside the hump this will darken the blacks and soften the whites. Now move the gamma slider (gray) to the right until the input reads 0.80 in the input box to darken the midtones slightly.
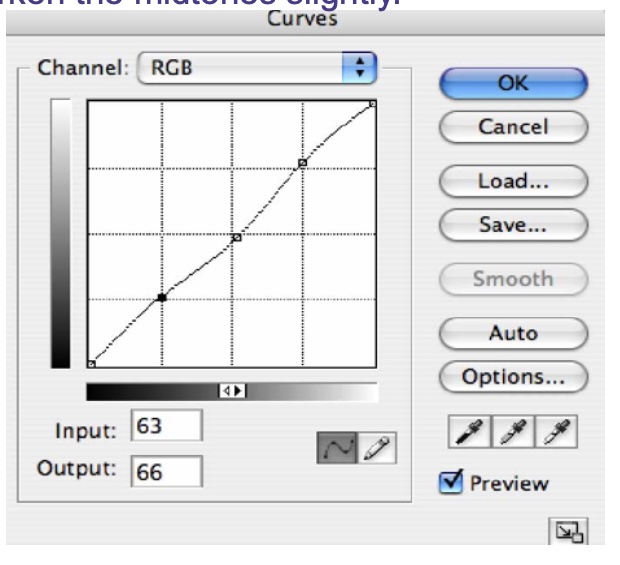
Now to adjust the midtones go to Image menu and scroll to Curves in the submenu. Make sure the dark end of the tone bar is at the bottom left. Click the middle of the diagonal line to move it back slightly. Then click on the line, near the top, and near the bottom. Move both points slightly higher by clicking one at a time. This will create a gently M- curve in the diagonal line.
The next step is to sharpen the whole image just a little. To do this go to the Filter menu, scroll down to Sharpen and then select and click Unsharp Mask in the submenu.
note: if you don’t have a access to Photoshop, many other types of photo editor will also provide standard tools such as Levels, Curves, and Sharpening.
METHOD
1. Open the image in Photoshop, scroll to Image size and ensure that the resolution is at least 150-300dpi.
2. Convert the image mode to CYMK and ensure that the Info palette is open.
3. Choosing the Color Sampler Tool select one channel at a time and look for the darkest area of each channel.
4. After the darkest channel has been identified, deselect all other channels.
5. Go to Image scroll to Adjustment and select Levels. In the Levels dialogue box slide right whith slider to the left until only a little amount of black remains. This black represents the darkest area of the image. Remember the area; click cancel in the levels dialogue box.
6. With the Color Sampler Tool go back to the darkest area and click the Sampler tool on it. A sample icon will appear with #1 in the image area.
7. Click on the top CMYK channel to select all the channels again.
8. Select Adjustment from the image menu and then Levels. In the dialogue box, using Info palette drag the left slider of the Levels dialogue box until the #1K on the Info palette until the desired level for the specific transparency is achieved. Click OK.
9. To apply registration marks at four corners of the image – go to Image Adjustments, scroll down and select Canvas Size and increase the canvas size an inch on all four sides. A border will appear around the image. Using the rectangular marquee tool create a parameter around the image ensuring that it is equidistant on all sides from the image. Go to EDIT select the stroke and change the weight to 2px. This command will drop a border all around the image. Keep the border at 4 corners and erase the rest. Discard layers, if any, save the image in Tiff format. You now need to split the channels to create four documents. Press on the arrow in the top right corner of the Channels palette and select Split Channels in the drop menu. The channels will appear in separate documents with registration marks and their respective names.
10. Place an Ink Jet transparency in the printer. In Adobe Photoshop, select the File menu and scroll to Page Setup. Make sure Paper Size and Orientation is appropriate in the dialogue box.
11. Set the resolution to 1440dpi. Set the media type to Photo Quality Glossy Film or equivalent, Super and the Ink setting to Black.
12. Press the Print button.
13. After all the transparencies are printed carry out a step test to find the correct exposure. All four plates are then exposed, developed and printed. (Follow instructions given in the article PERFECT REGISTRATION for applying registration marks, exposing and printing).
The 4-color Intaglio-Type process and making of digital half-tone transparencies was originally developed by David Jay Reed during his years at RIT. The method described above contains the core concept of his process together with my own changes and adjustments to make it suitable for my process with registration pins.

Indrani Nayar-Gall
Indrani Gall has been actively engaged in the field of printmaking as an artist and educator for many years. In 2005 she furthered her studies in contemporary nontoxic Printmaking at Rochester Institute of Technology. Her innovations have advanced the 4-color process, making it more accessible with the use of simpler technology, an easier registration process, and other innovative color processes. She introduced nontoxic practices to the printmaking department of Barbados Community College (area coordinator) in 2002. She has been instrumental in introducing ‘green’ Intaglio printmaking processes at WMU.
To contact the artist Email: indranigall@yahoo.com
Indrani Nayar-Gall
Full Site Map: a l l p a g e s / t o p i c s
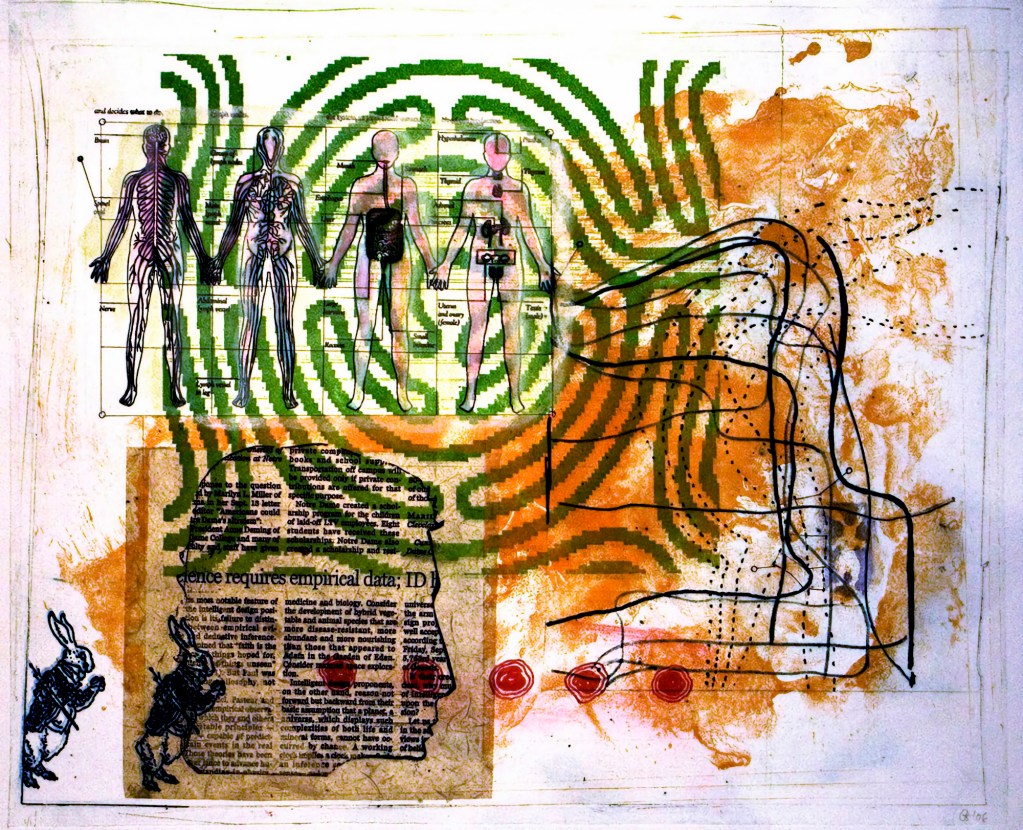
Anatomy Lesson with Warp Tool, 2006, Monoprint: Intaglio Type, Chine Colle and drawing, 13.25 x 16 inches
ARTIST HOMEPAGE: